A photo competition was the catalyst for this story, after some submissions of aquarium pictures were less successful than hoped. We saw pictures with flashes in the middle of the front glass, fish blurred out of focus, and reflections in the glass of the owners in their underwear, which somewhat detracted from the beautiful fish in the attractive aquarium. At times it was more like one of those funny dog photo competitions, with photos showing four-legged friends in every conceivable pose, where the fact that they were often rather unintentionally funny was all part of the fun.
The aquarium panes are the main problem

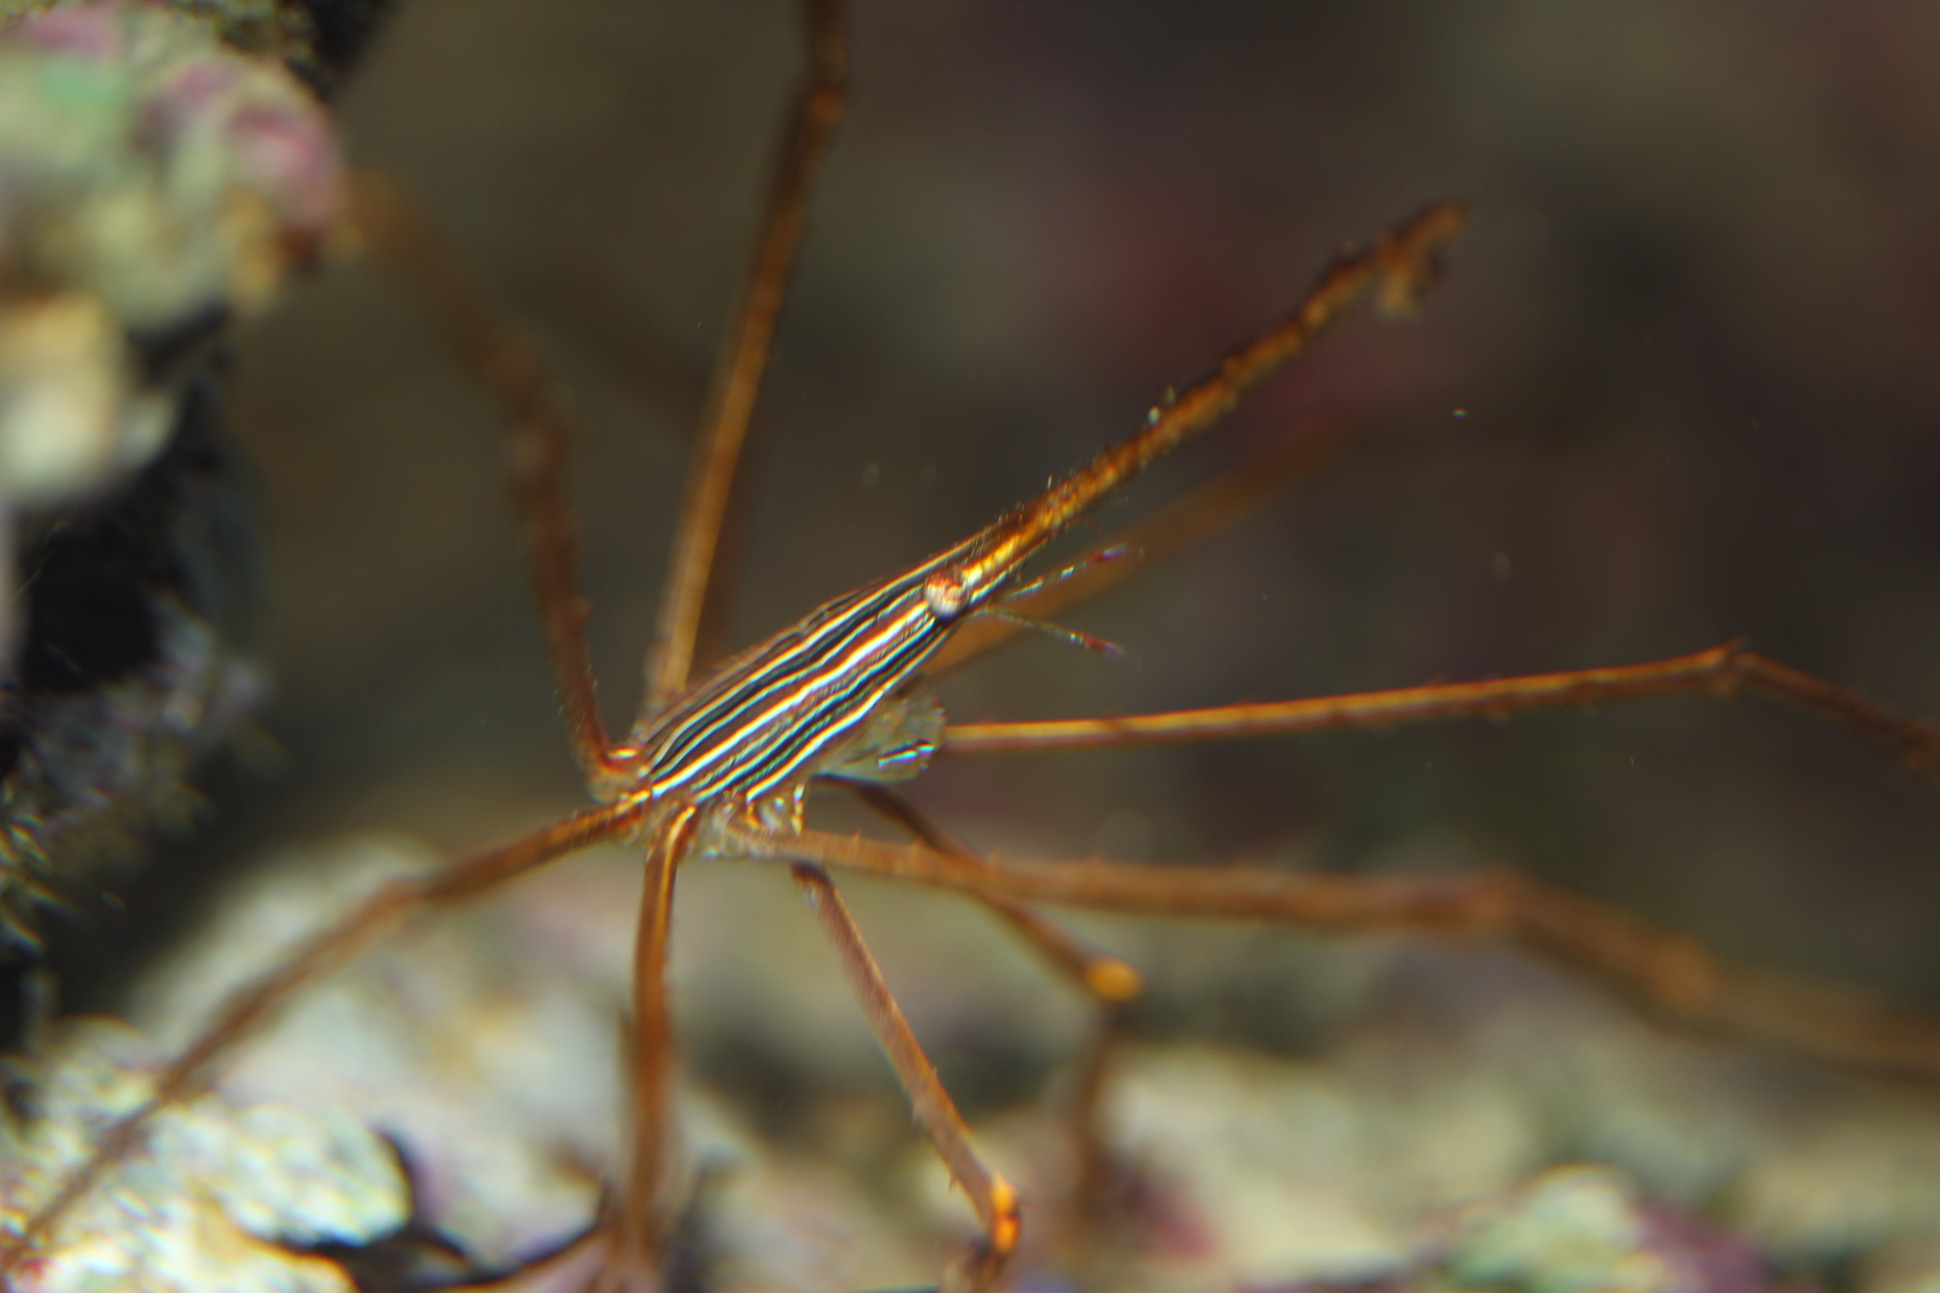
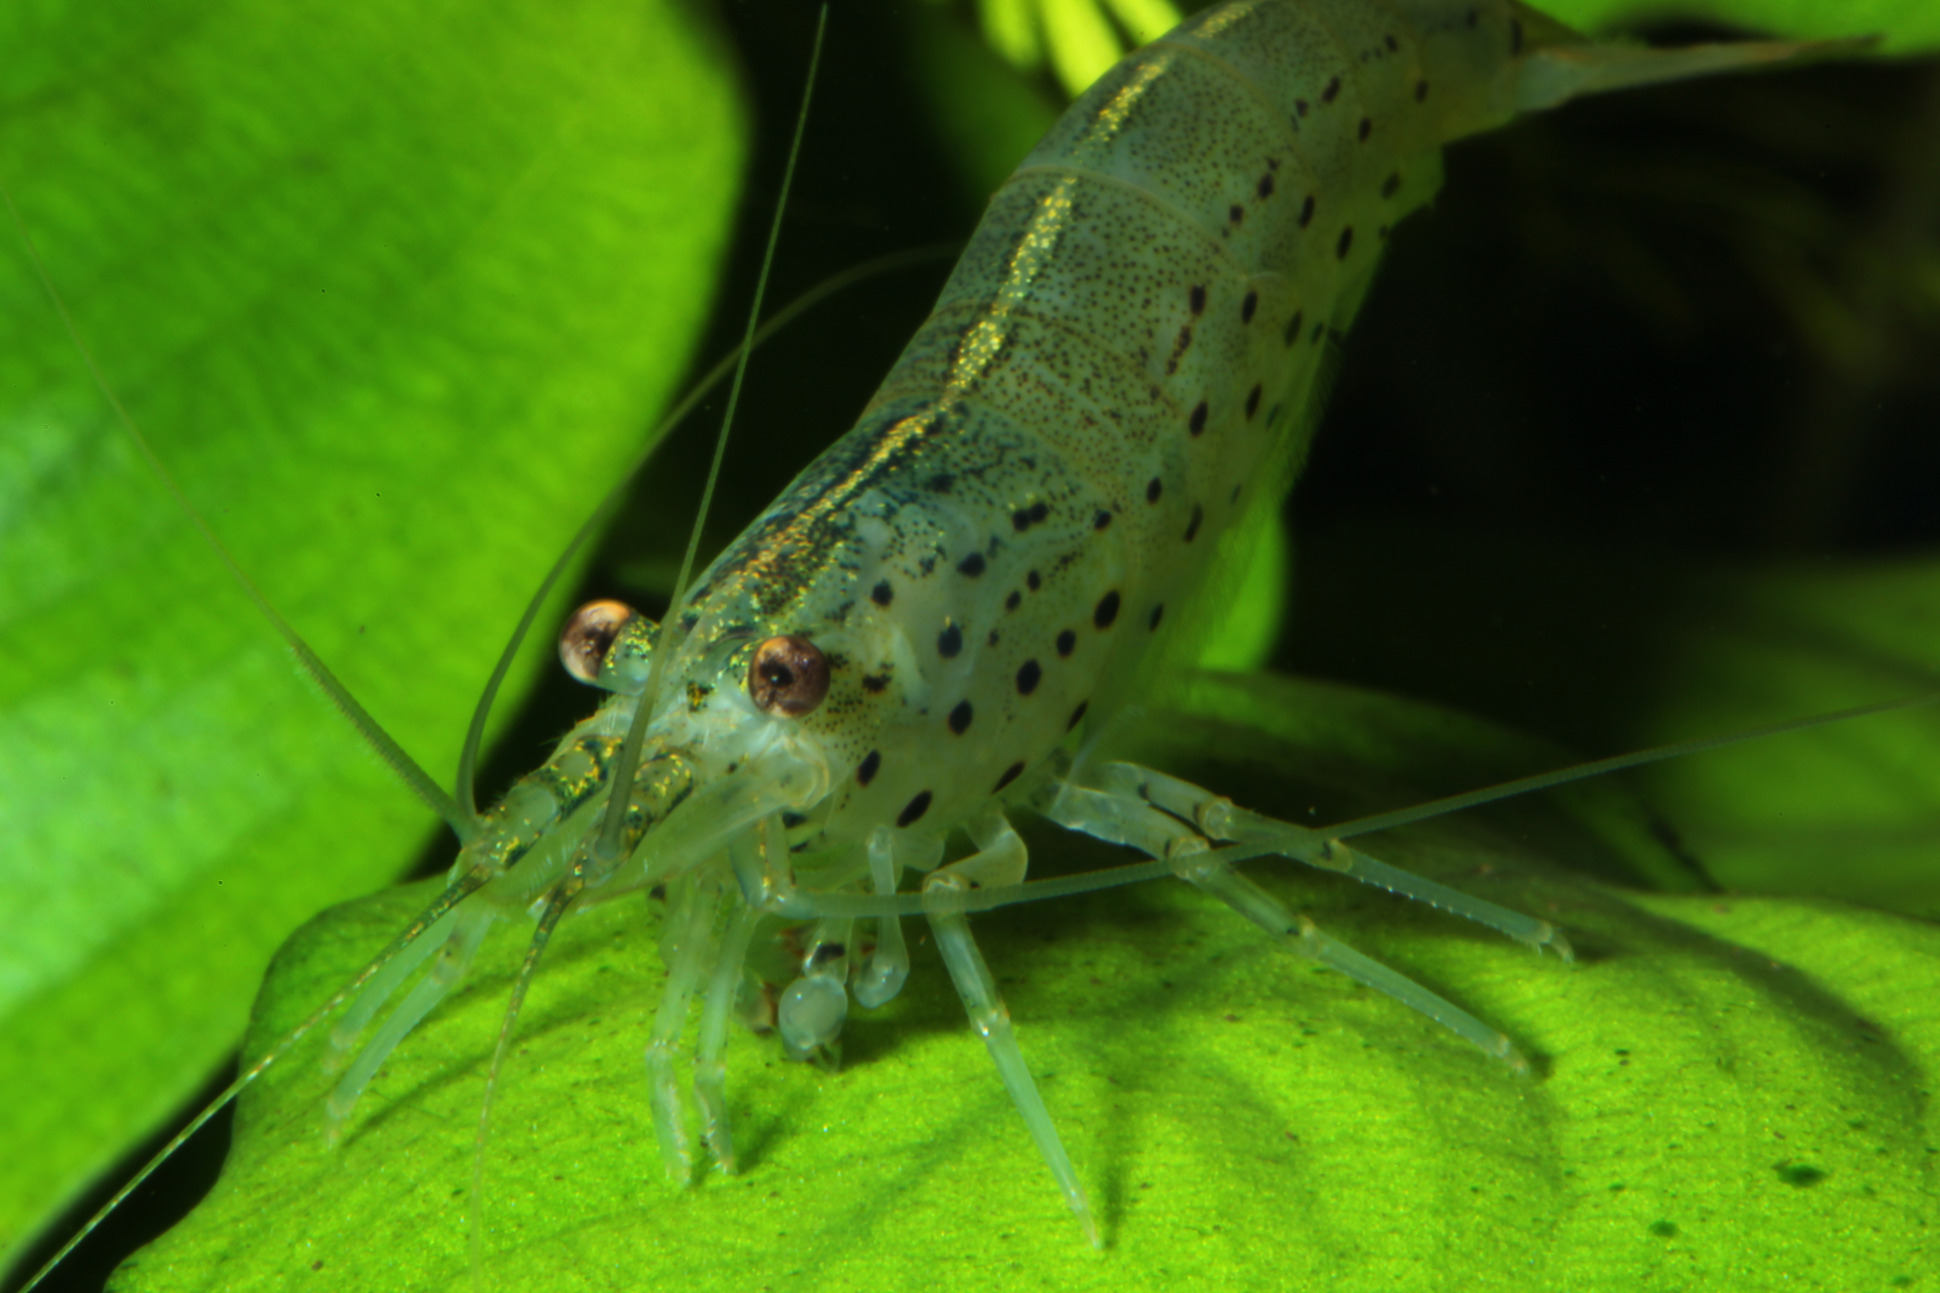
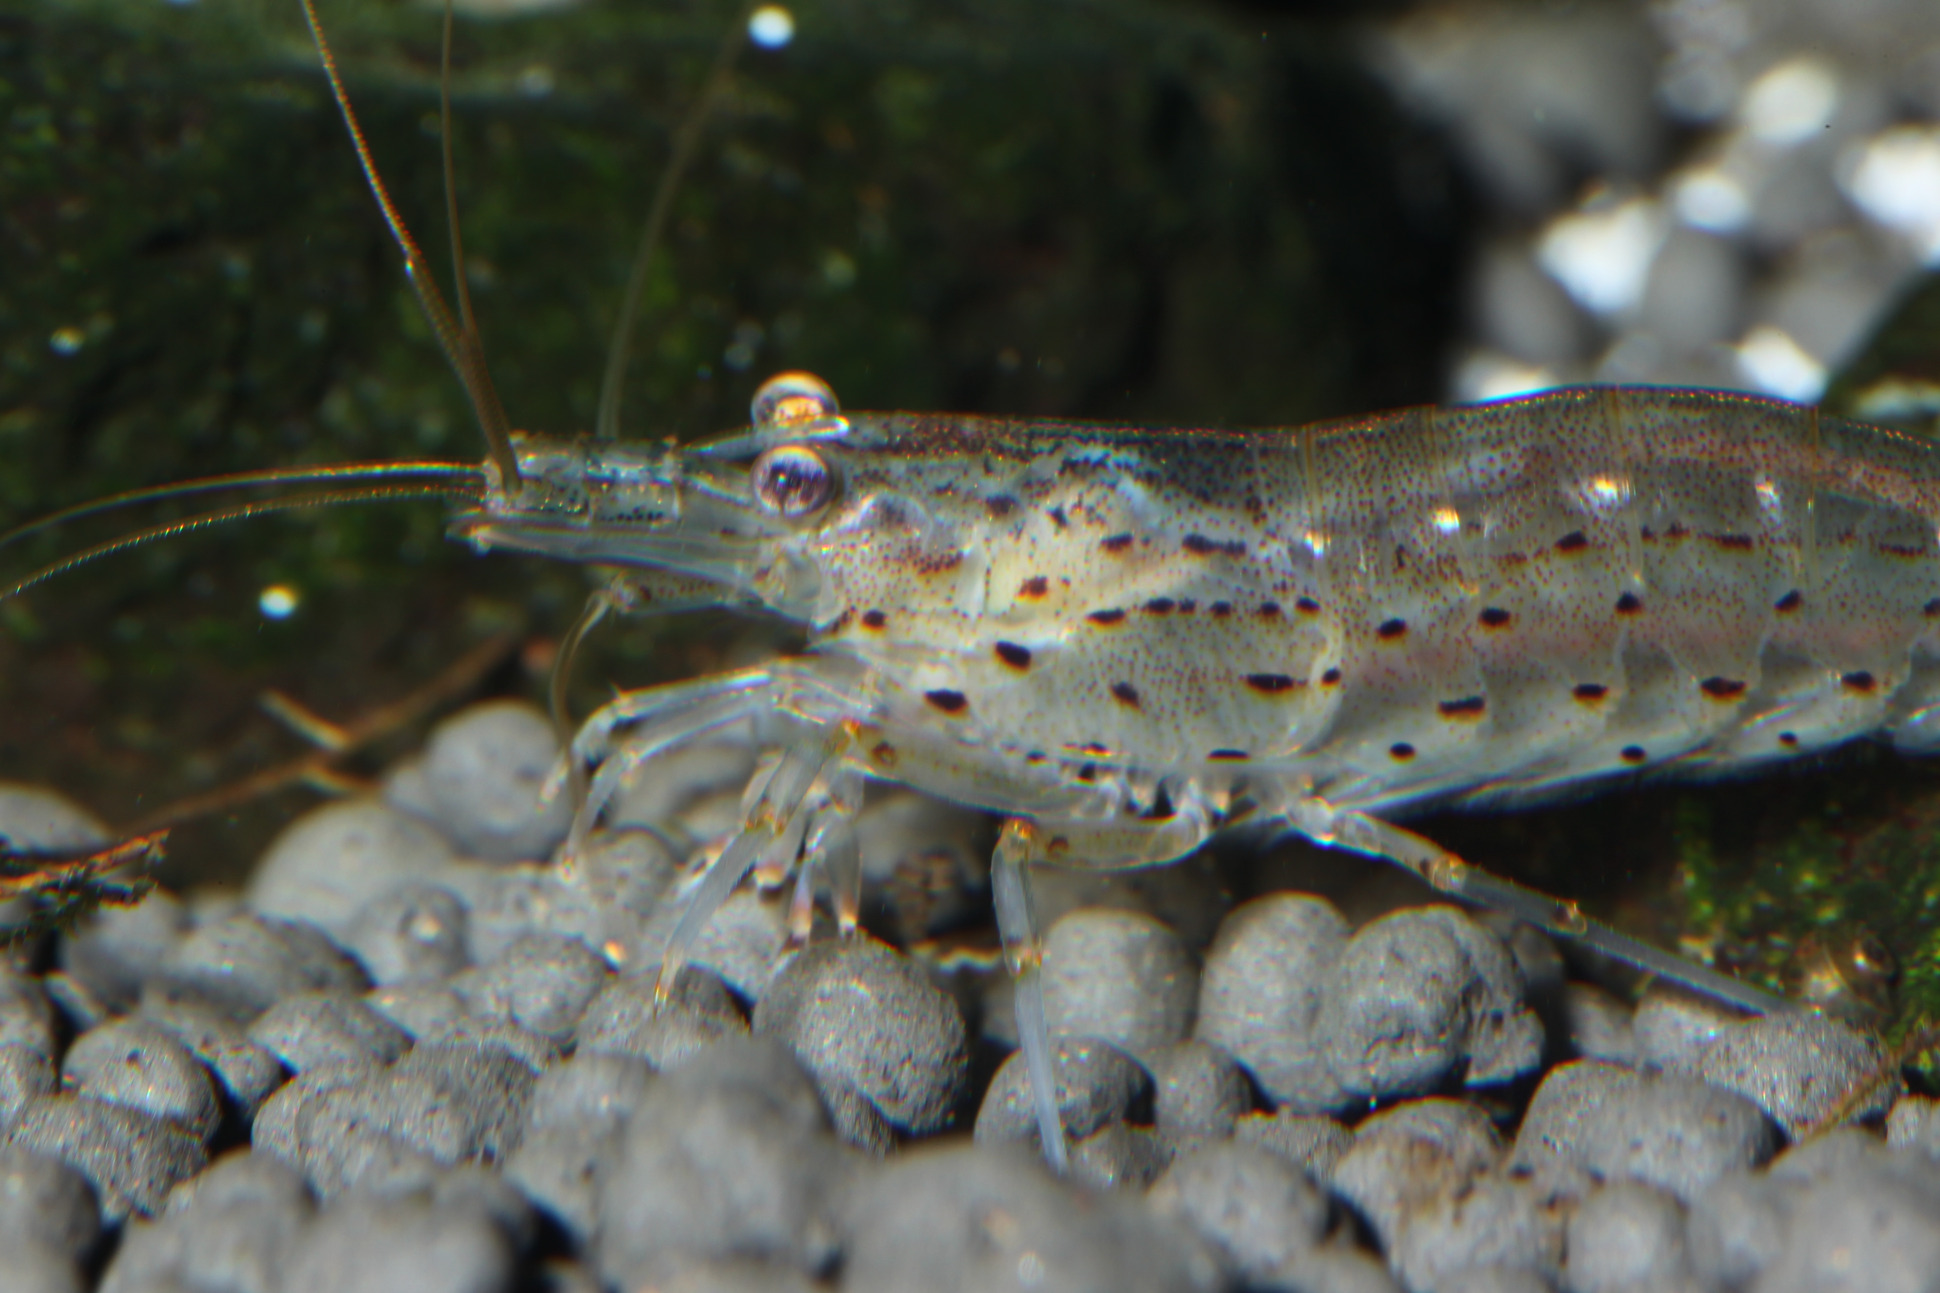
Literally anyone can take beautiful aquarium and fish or invertebrate photos if they just follow a few basic rules. It’s not as difficult as taking a full-format photo of a shrimp head.
Whether you’re using a mobile phone camera, a simple camera or single-lens reflex camera - a few rules apply to all types. Because of the low amount of light in aquarium lighting (approx. 1000 lux compared to 100,000 lux at noon in nature), all cameras will increase their exposure time to allow enough light to reach the sensor. However, this doesn’t freeze movement, and the fish or the whole shot can become blurred (which, by the way, are two different things). Placing the camera on a solid surface or using a tripod helps avoid blurring and an exposure time shorter than 1/80 sec helps avoid motion blur. Most people counterbalance the lack of light by increasing the light sensitivity, which can be done via the ISO setting. The higher the ISO number, the less light is needed for a photo. Sounds good, but it has a huge disadvantage: depending on the camera quality, the image quality decreases with increasing ISO number. In general, the ideal ISO number is as low as possible (ISO 100-200). ISO numbers of 800-2000 and higher are actually only usable by top cameras. But who has a €6000 camera at their disposal? In the example photos you can clearly see how the granularity of the pictures increases strongly at high ISO numbers. Unfortunately, with mobile phones and very simple cameras you cannot set the ISO number. You have to live with whatever the camera chooses. This is exactly where the advantages of the "real" cameras begin compared to mobile phones, which can produce really perfect photos in good light conditions.
The light
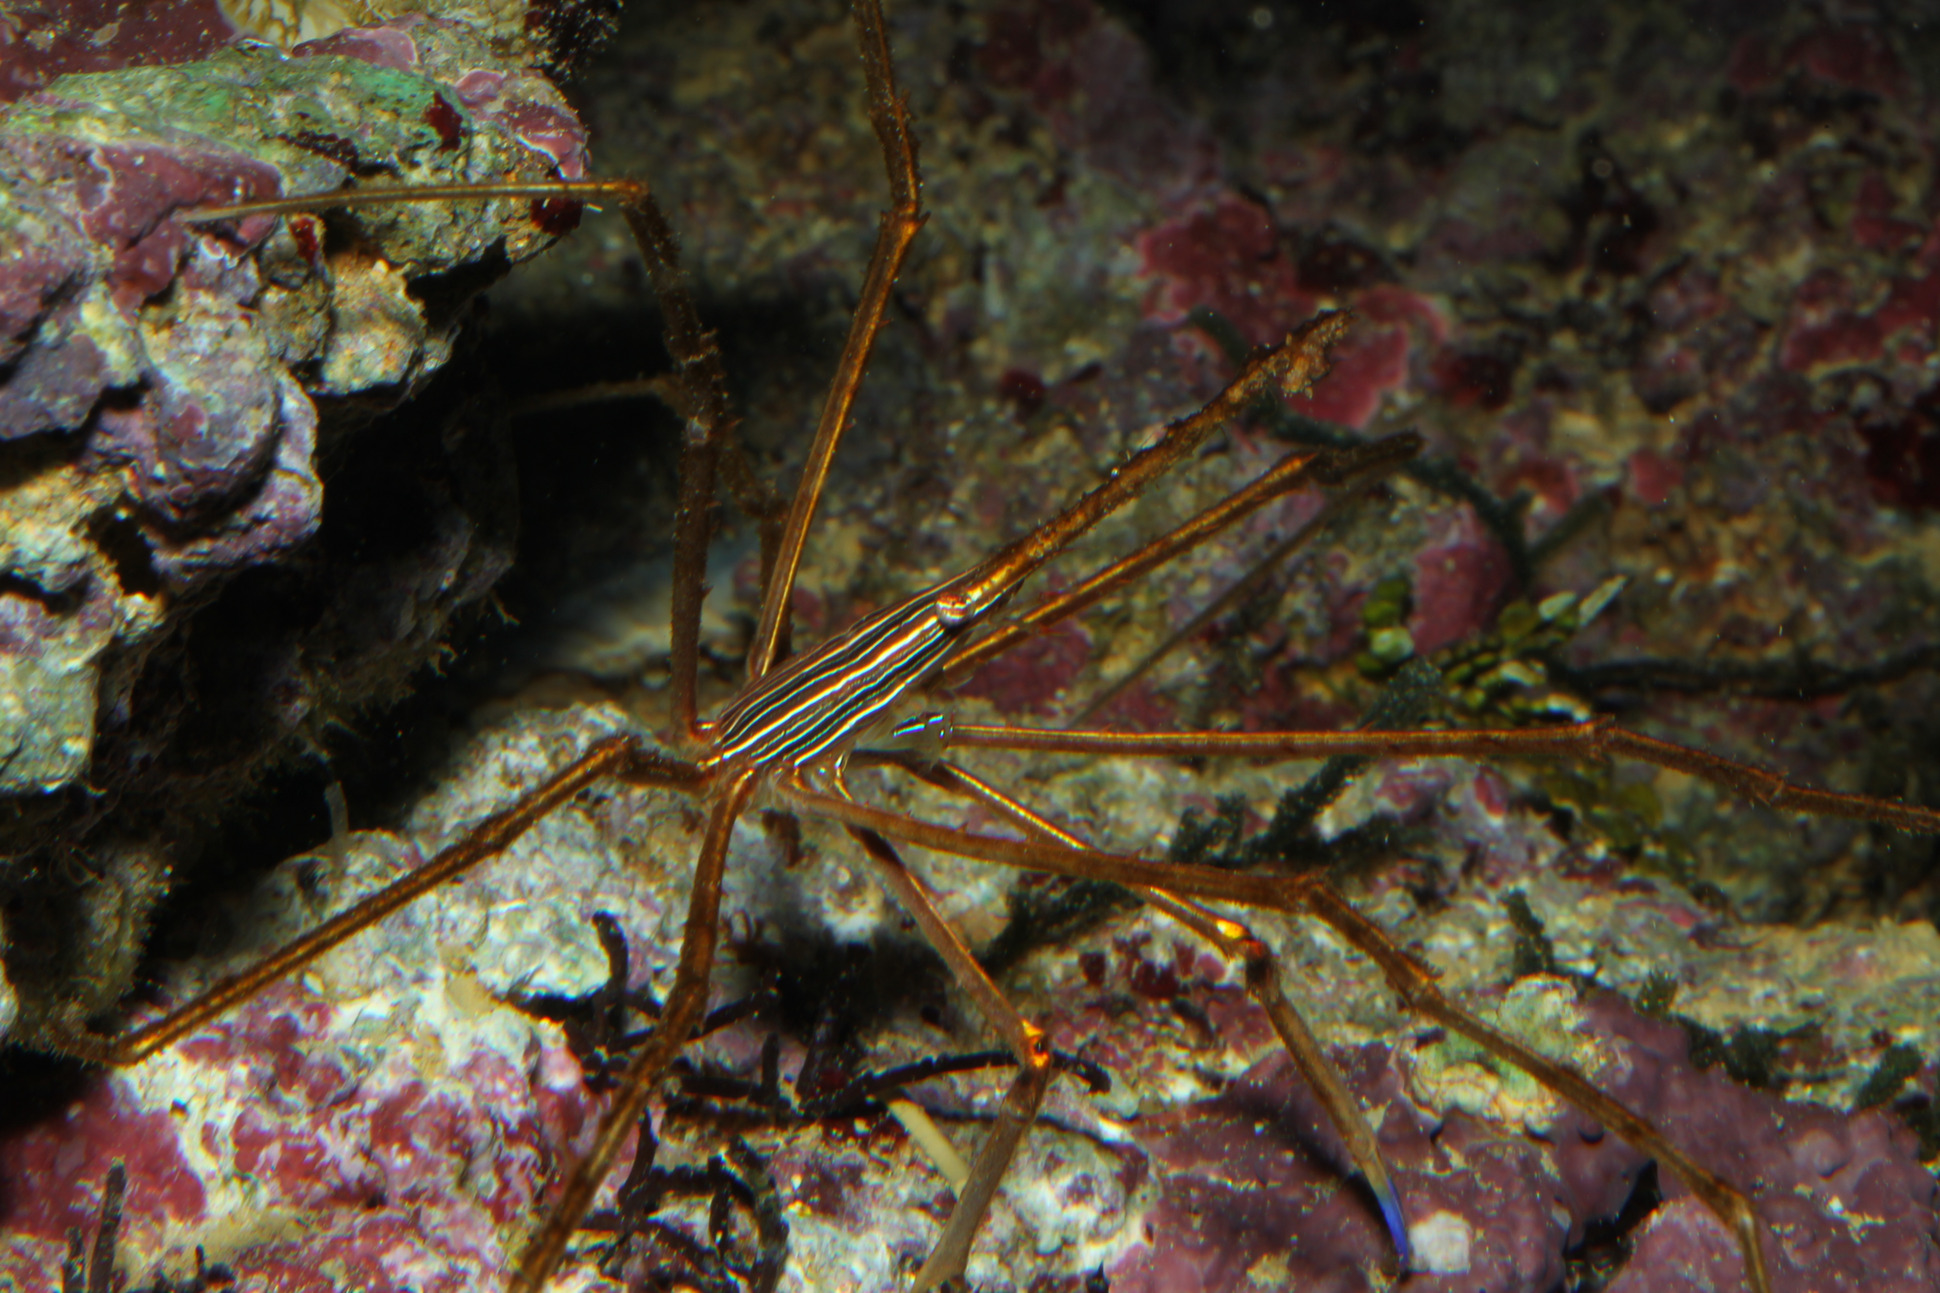
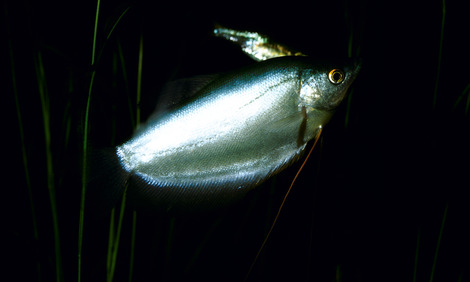
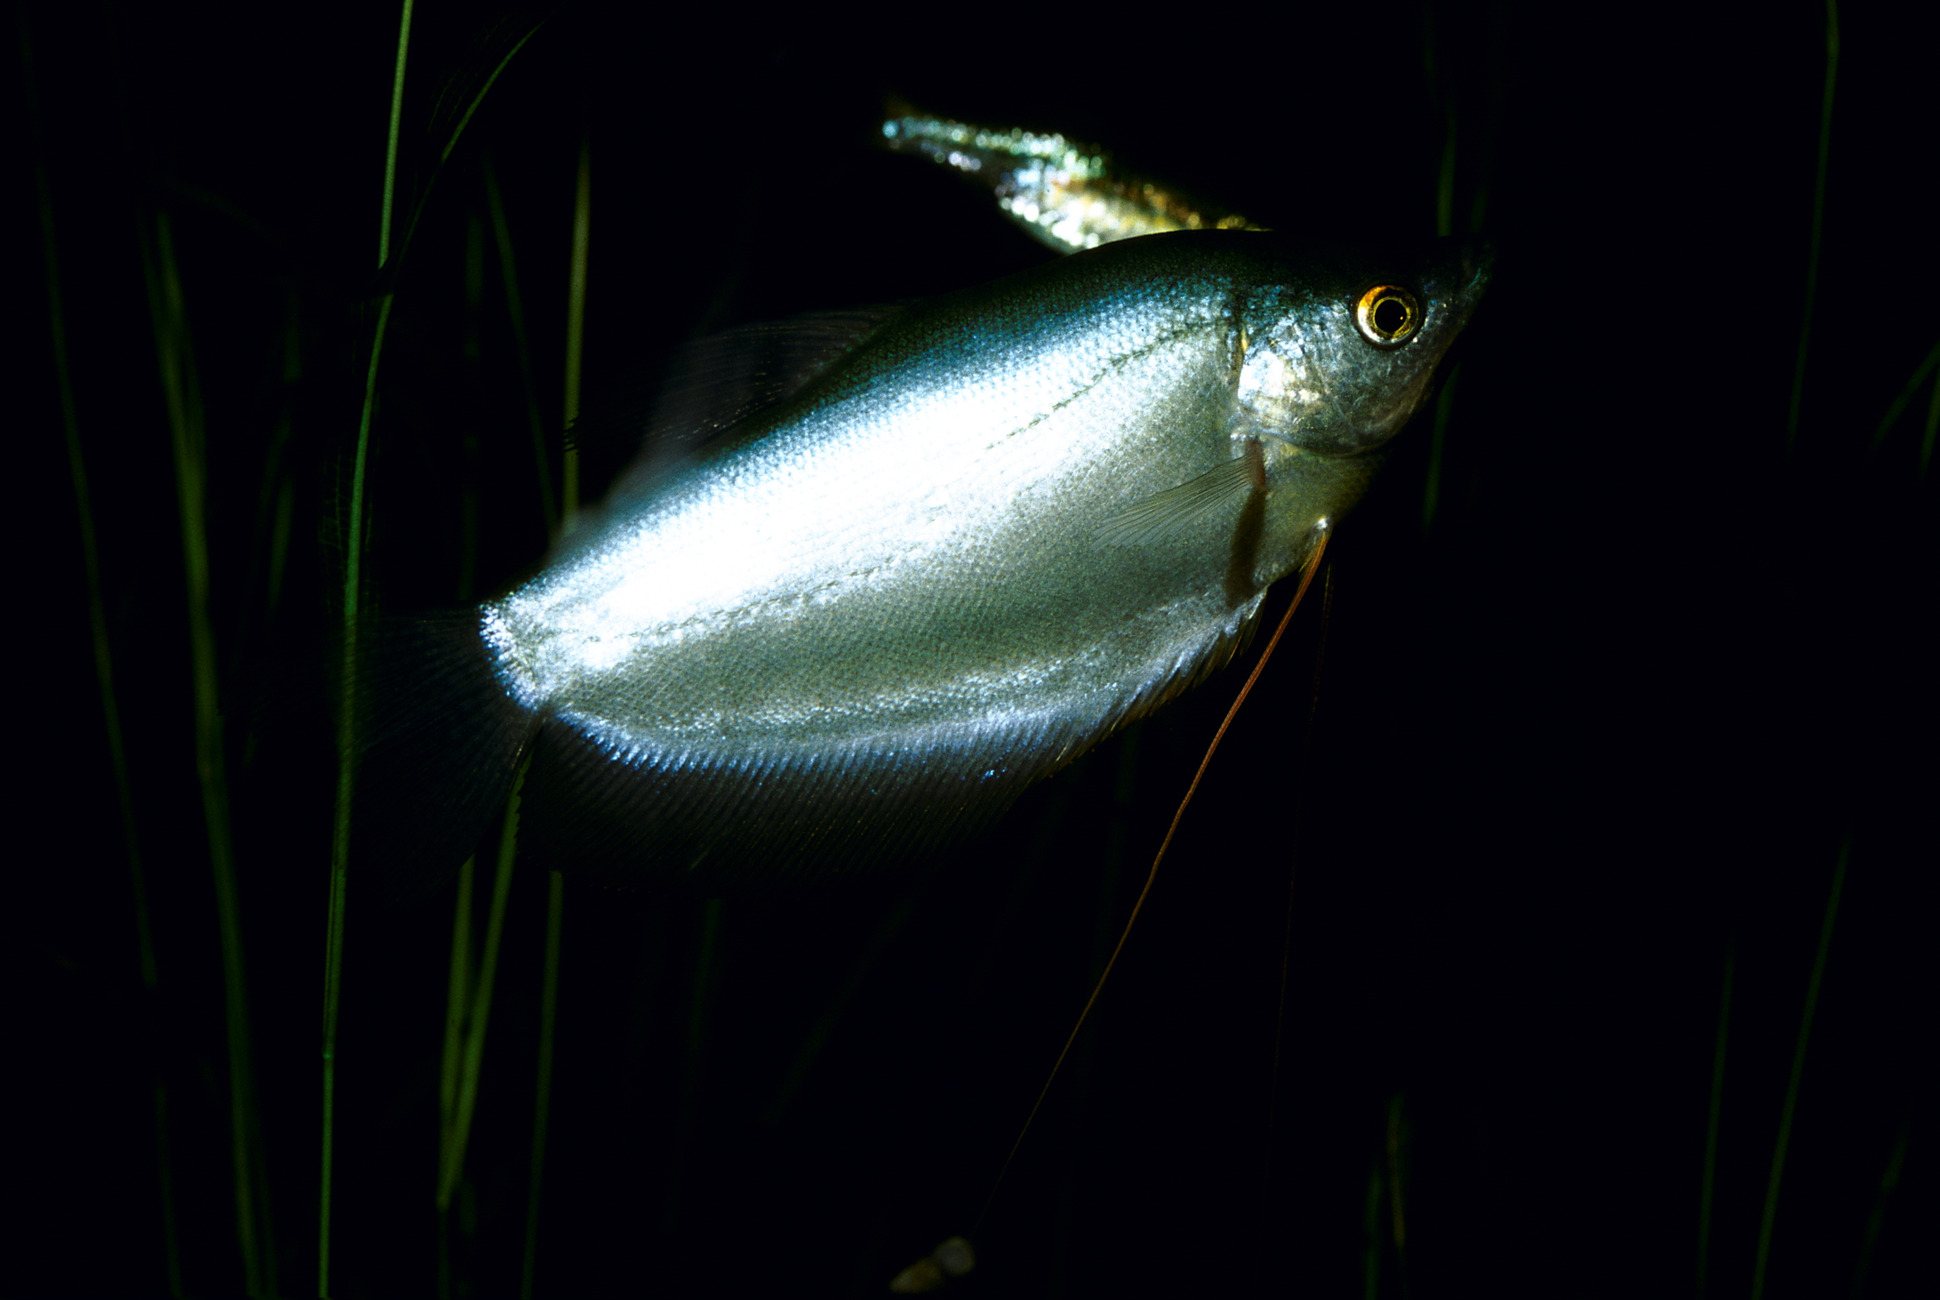
A flash helps to optimise the lighting situation. But if you stand in front of an aquarium and flash into the front glass, the flash will be visible in the picture. Think back to your school physics lessons: Angle of incidence (of light) is equal to angle of reflection. As soon as you stand a little to the side, the angles change and the flash will no longer be visible in the windscreen. A torch helps you determine which is the best position for the flash not to be visible in the picture. If you can see the torch in the picture (through the viewfinder or in the display), the flash will also be visible in the end picture. Of course, the sideways position has disadvantages too: the more sideways you photograph through a pane of glass, the more optical distortion you will unfortunately get. For an overall photo of the aquarium, this is not yet a problem, but for detailed photos of animals in the aquarium, the distortions become very apparent.
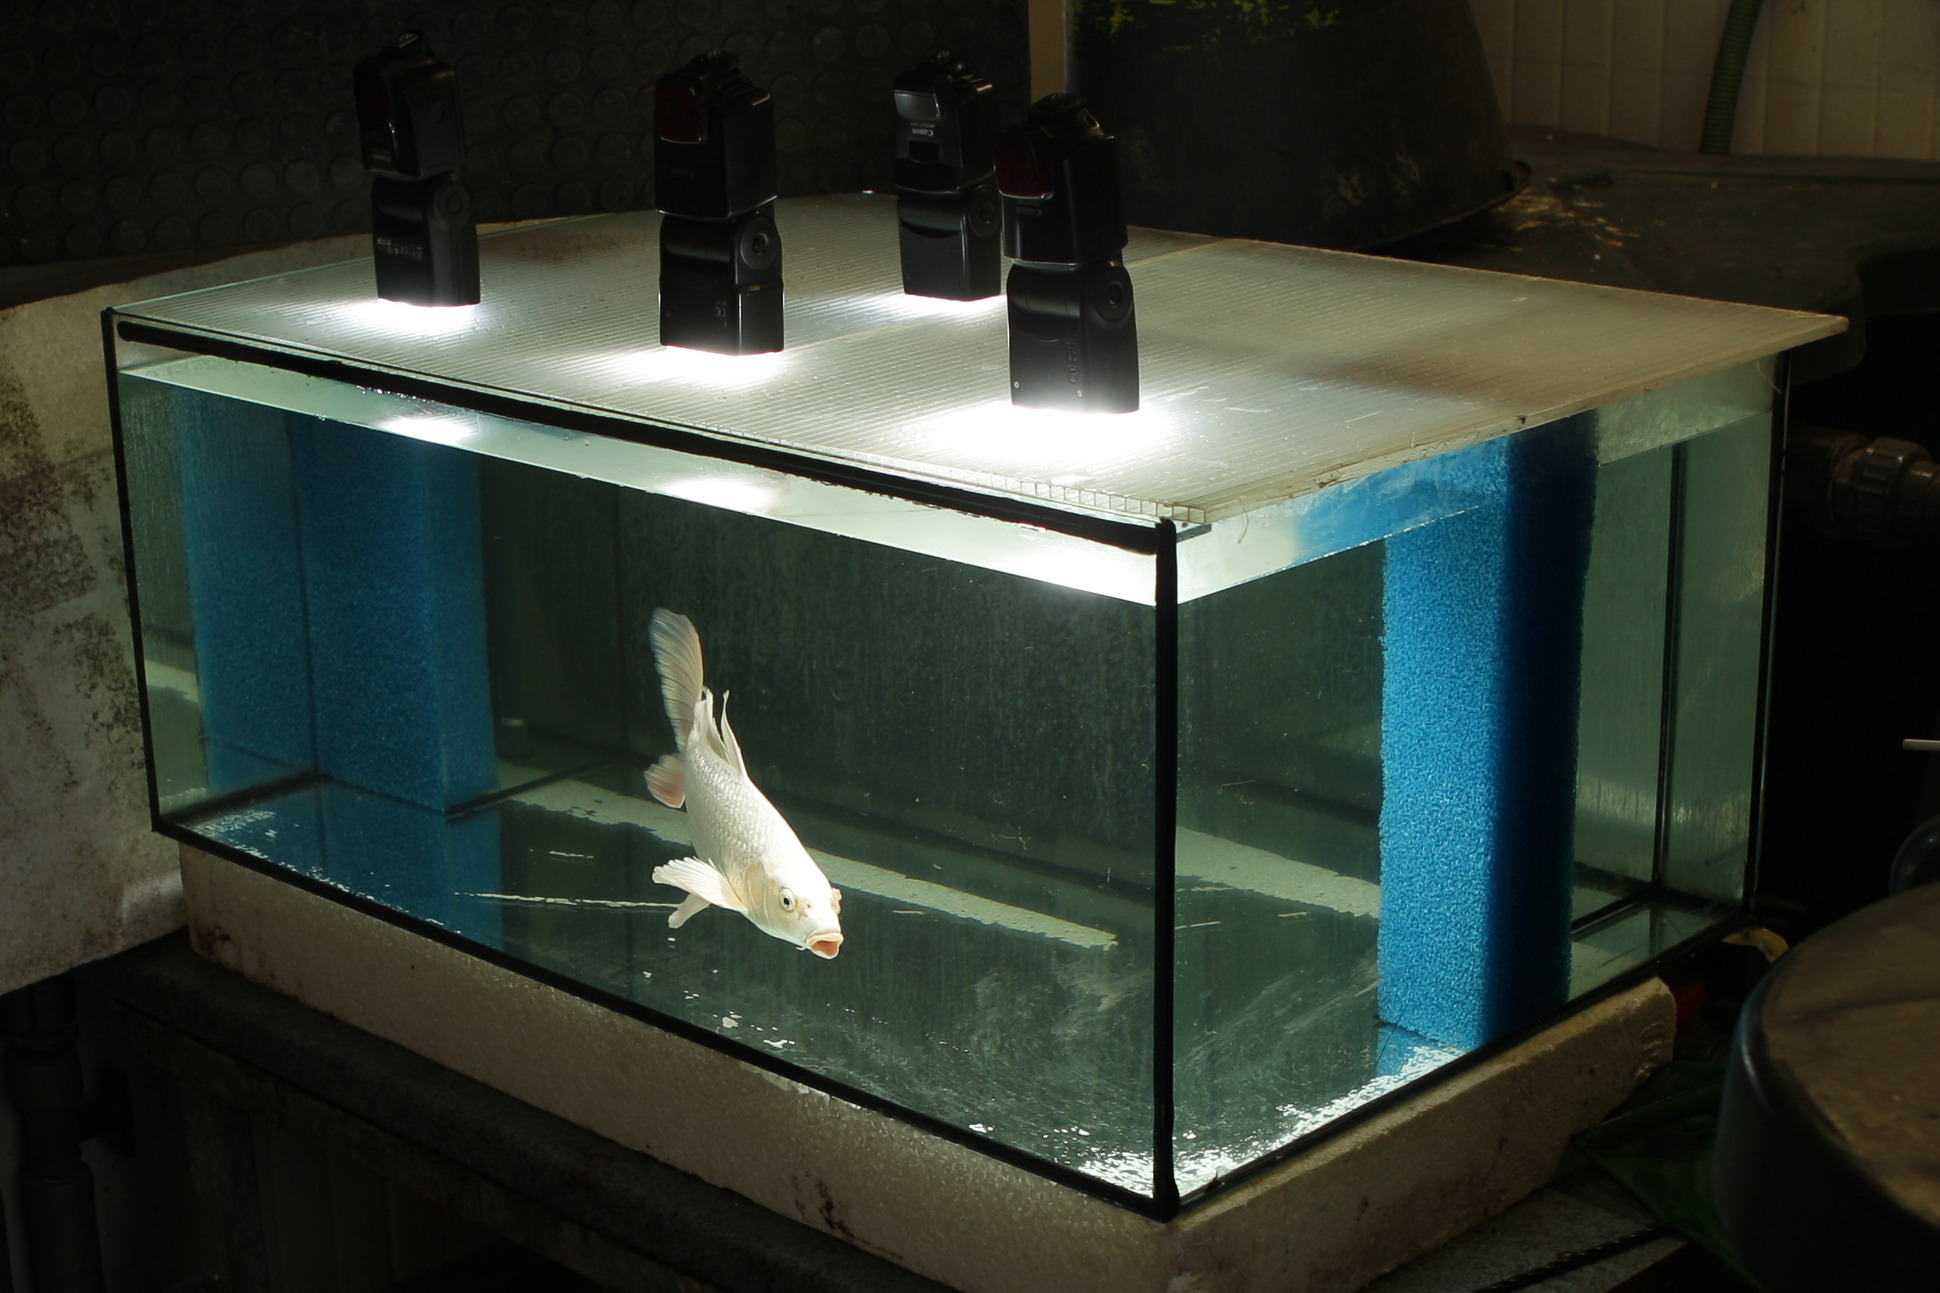
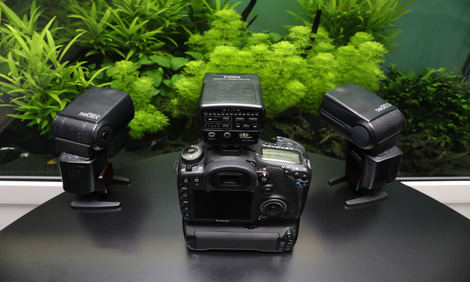
Single-lens reflex camera users can decouple their external flash unit from the camera and - using a cable or an infrared remote trigger - position it so that the flash is no longer reflected in the pane, even when the camera is positioned in front of it. Unfortunately this really requires three hands: One for the flash, one for the camera and one on the lens for manual focusing, because the autofocus can prove to be inadequate when you’re trying to focus on the zebra danio swimming at the speed of light in moderate aquarium light. A small camera rail is an inexpensive and practical remedy here. You can attach it to the tripod thread at the bottom of the camera body and it will hold the flash in place. If you can afford it, it’s worth investing in a second flash to illuminate the animals more evenly. Two flashes offer another advantage: each flash only needs to emit only half the power, which means that, say, any solid matter suspended in the water is less illuminated. Cable release is not possible with two flashes, and only infrared remote release remains. Infrared offers another advantage: the flashes can be positioned several metres away from the camera. The cable would be too short for this. Thus, flashes can be placed on top of a cover glass of the aquarium and illuminate the aquarium quite evenly from above. A lot of flashes have a flash diffuser that can be folded in front of the reflector. It’s best to use this diffuser as it softens the flash and prevents harsh shadows.
Reflections and dirt
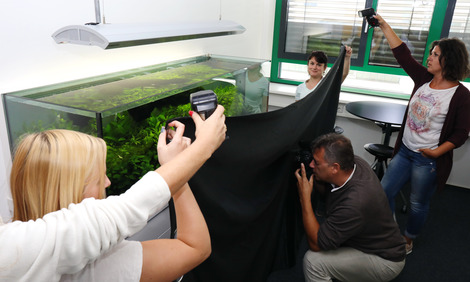
Other reflections and dirt on the front pane are common problems. Remember to clean the front pane thoroughly so that it is free of smears before taking the first photos. Nothing is more annoying than a great photo rendered unusable by smears on the pane. And reflections of the camera or photographer in the front pane are also not ideal, unless it’s meant as a selfie. Black clothes or, even better, a black cloth with a hole for the lens are one perfect solution to prevent reflections of the room in the aquarium pane. I admit that this sounds like an effort, but it is sometimes unavoidable. In the Aquarium Berlin, for example, the aquariums opposite are always reflected in the front pane. This can really only be avoided with a black cloth and an assistant.
The polarizing filter
A polarizing filter, screwed onto the filter thread of the lens, also reduces reflections on reflective surfaces. Polarizing filters are not cheap, they absorb some light and do not solve reflection problems 100%, but nevertheless, they are a good help!
Depth of field
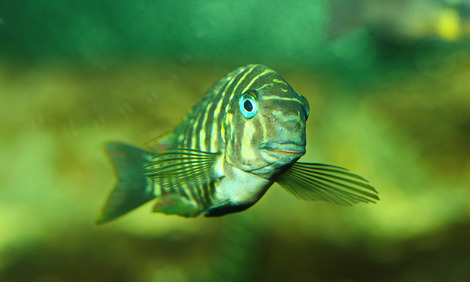
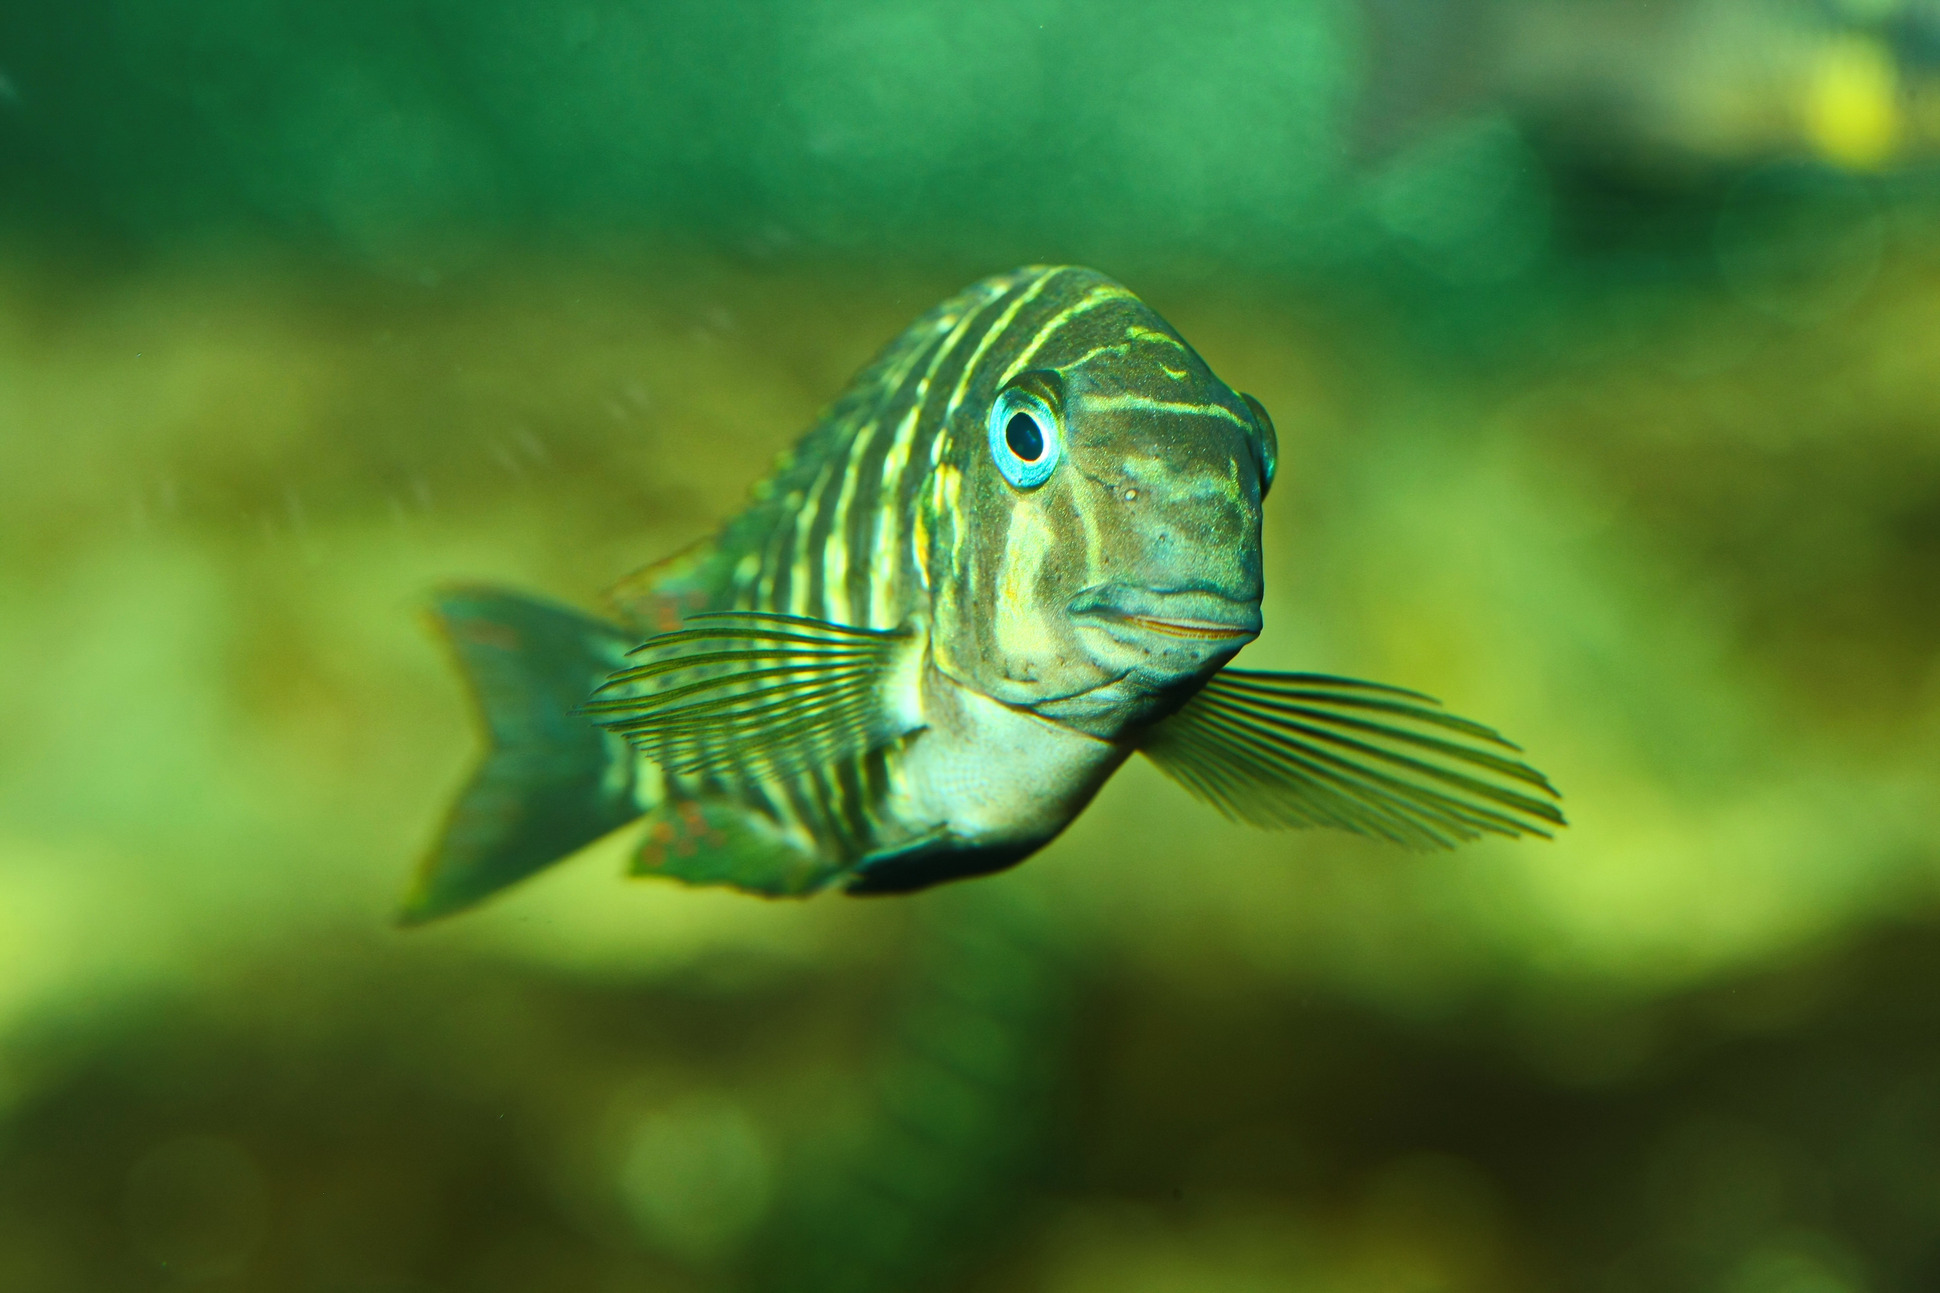
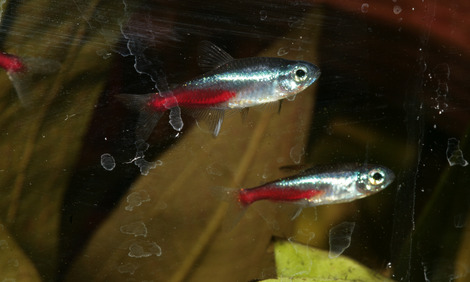
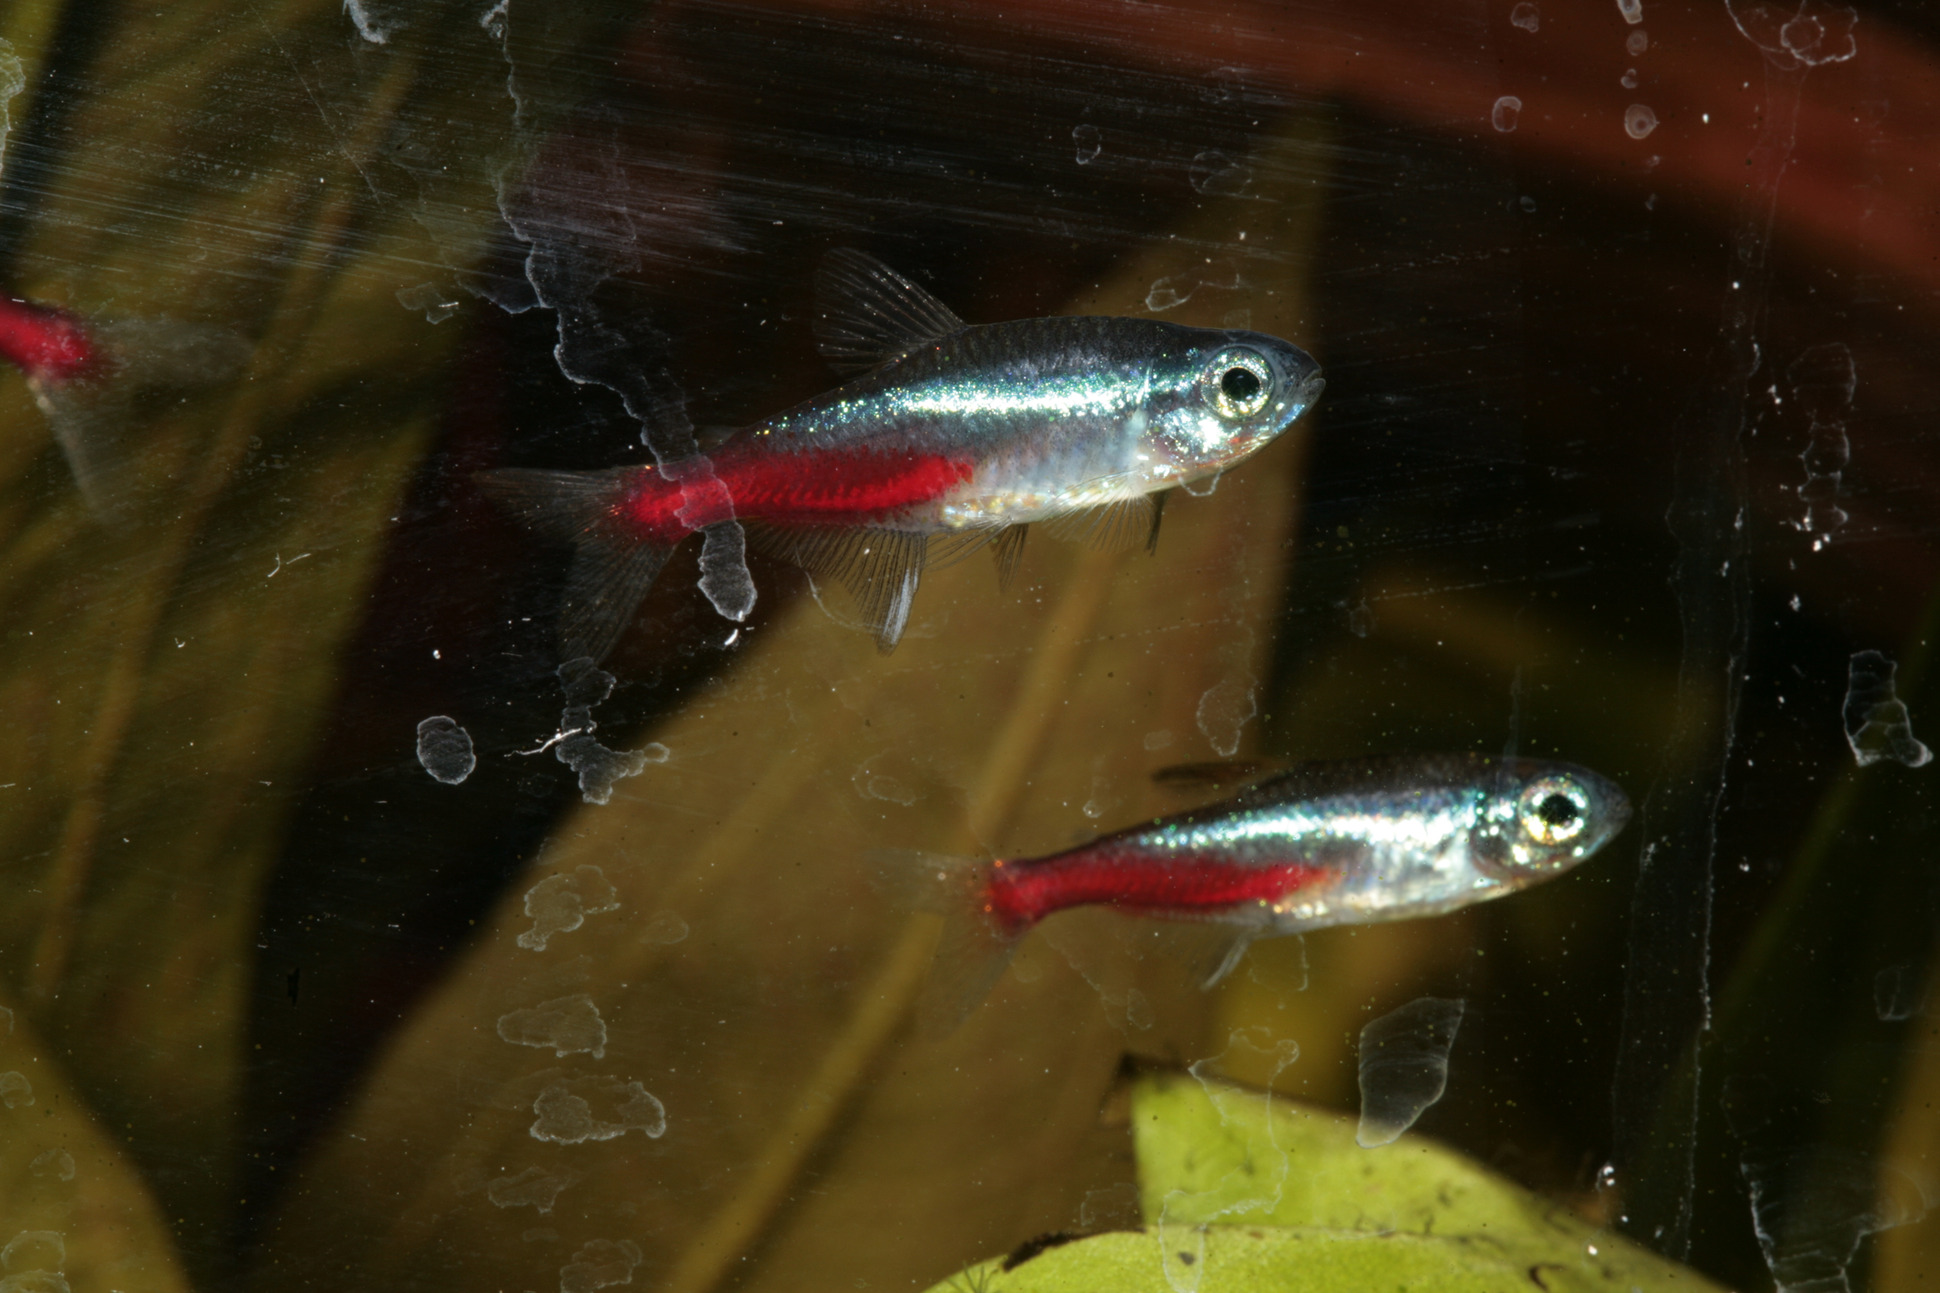
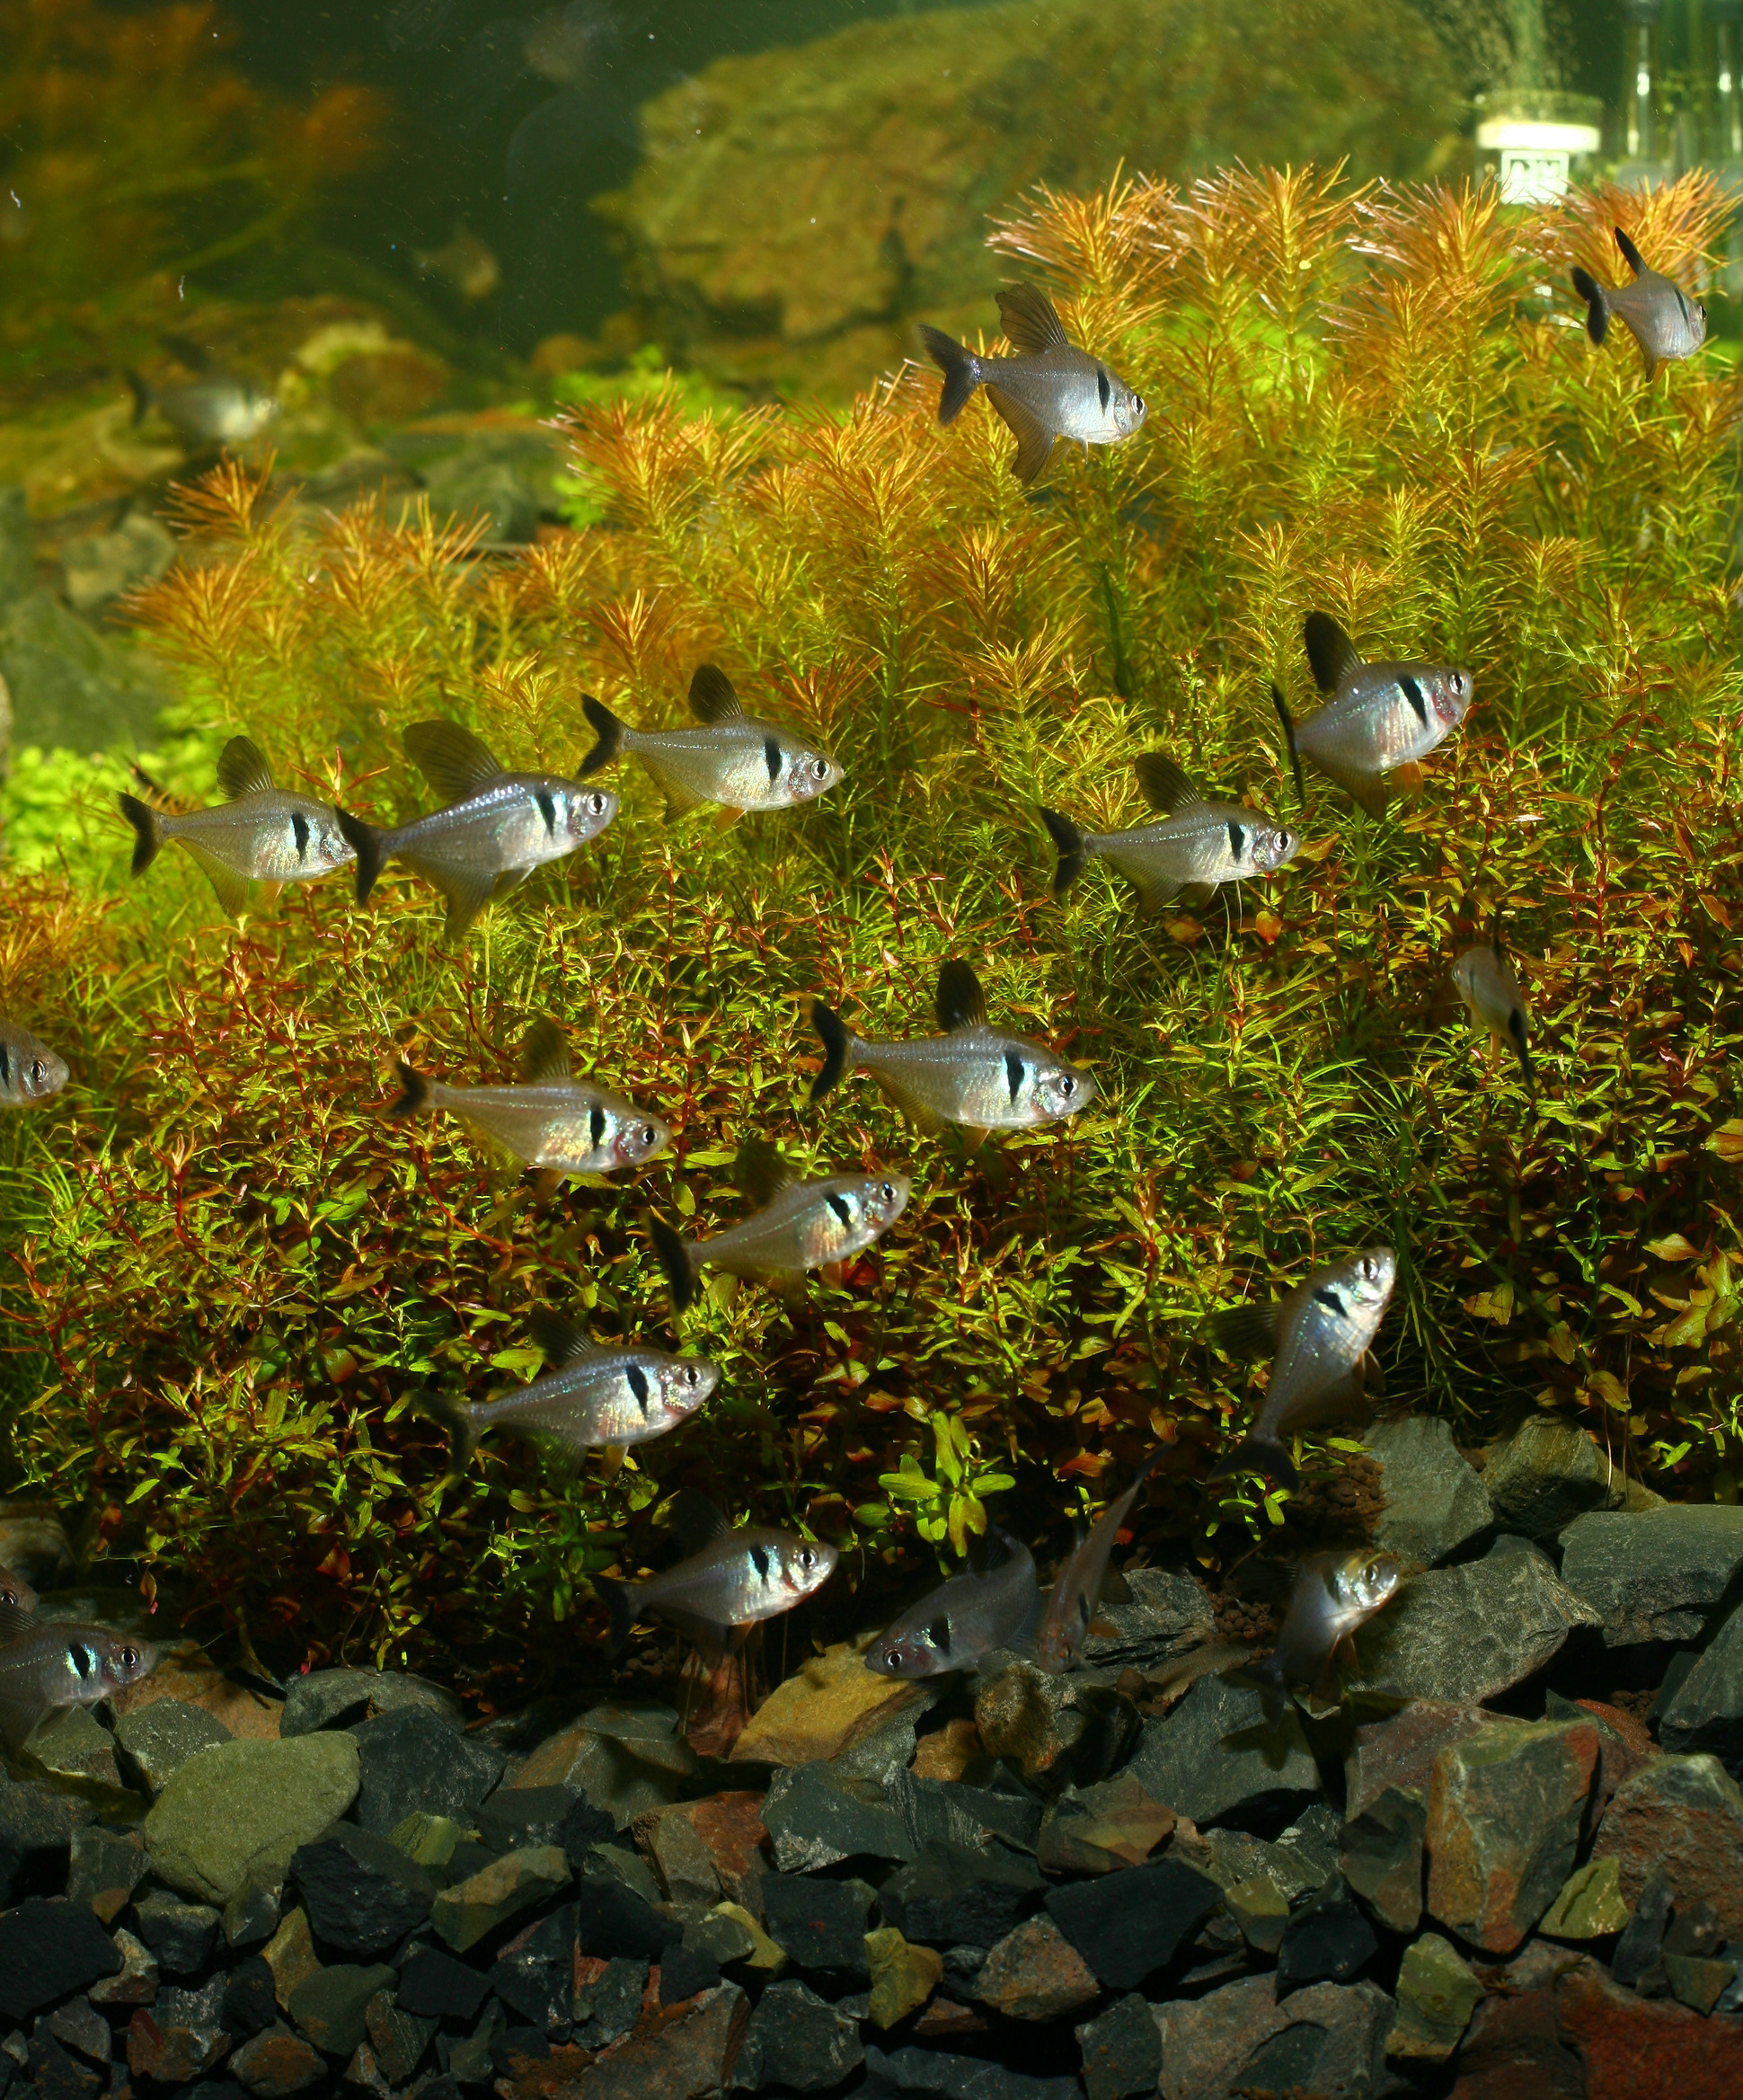
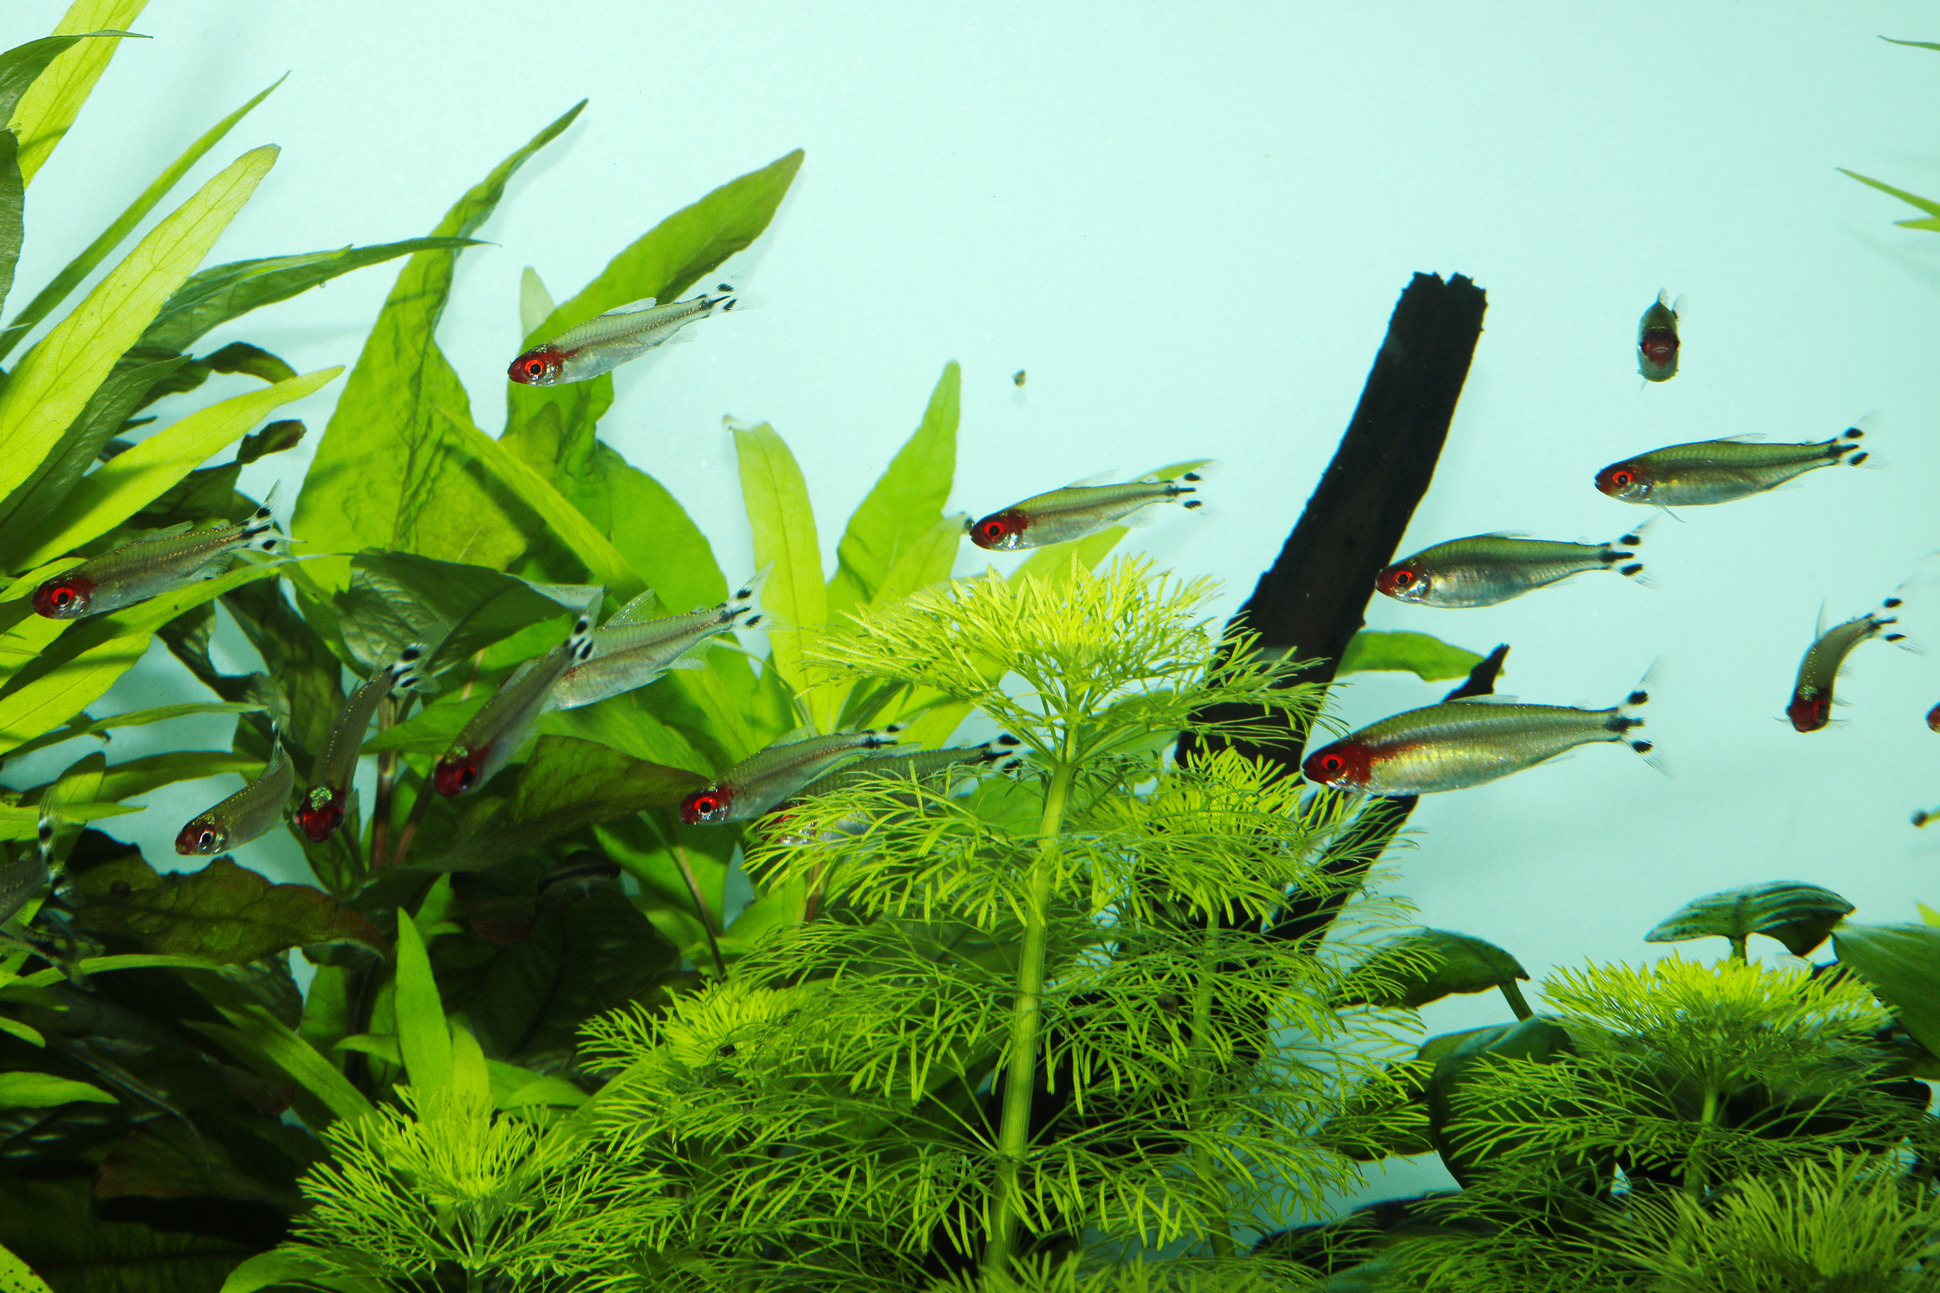
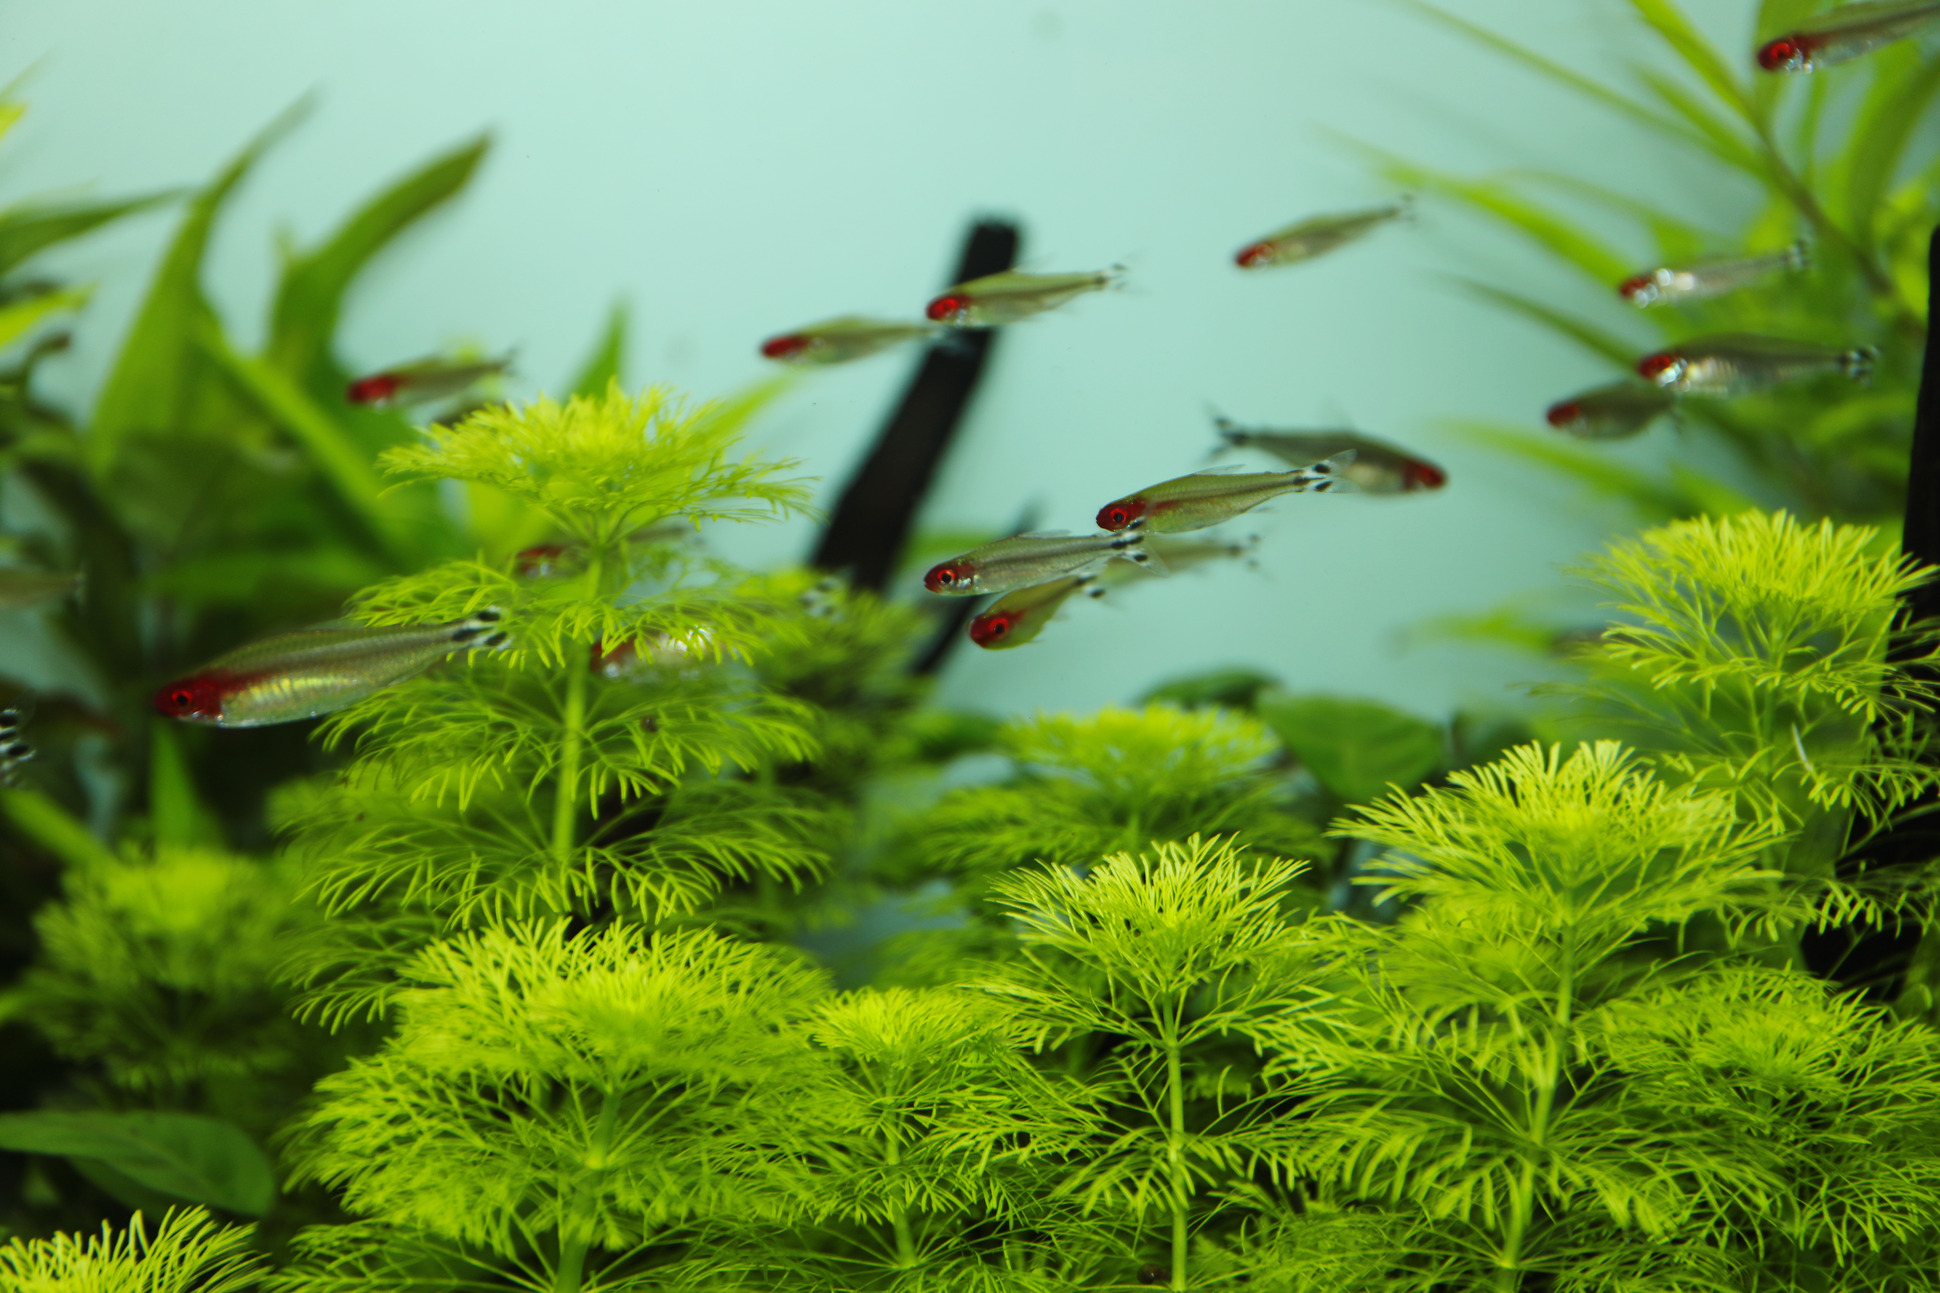
If you’re using a flash you’ll have enough light and probably have eliminated motion blur and camera shake. The main advantage, however, is the better depth of field. Depth of field means that not only one area (e.g. the head) of your subject is in focus, but also the adjoining body of the fish. A fish swimming transversely to the camera is not affected by this depth of field issue, but a fish standing lengthwise is. The longer the fish (e.g. panchax), the less of it will be in focus. The lens of your camera has an aperture that regulates the incidence of light. A completely open aperture (small value, e.g. 2.8) results in no depth to very shallow depth of field. The more you close the aperture, the better the depth of field. The higher aperture value (e.g. 22) means more closed. The more you close the aperture, the more light is needed. You can apply this depth of field for different effects. If you want the fish swimming parallel to the camera to be sharp, but the green plant background to be blurred, open the aperture a little more. If, however, you want the shoal of fish with several fish at different distances from the camera (shoal of neons) to be in focus, you need to close the aperture as much as possible. Be sure to study the subject of aperture and photograph the same object with all available aperture stops. Then you will immediately see what a strong influence the aperture has on your picture. The three factors ISO number, exposure time and aperture are the main pillars for a successful picture. The faster you can access the three factors on the camera and know how to operate them, the faster you can correct the image in the desired direction when taking the picture.
The exposure compensation
There is an exposure compensation option on almost all cameras, often also separately for flash exposure. You definitely need to know this +/- correction! Not only for aquarium and fish photos, but literally for every photo, this is the quickest way to make the picture brighter or darker. Silvery fish have a tendency to reflect the flashlight like a mirror. In this case, the flash exposure needs to be corrected towards minus. If the fish or aquarium appears too dark, the correction can be shifted towards plus and the picture will be perfectly exposed. Ideally you need to be able to operate this correction on the camera without looking!
The image section or zoom
With mobile phones and simple cameras, you can select a section of the picture, usually by using the touch display. So you are standing in the room, your display shows the aquarium as a whole, and you now zoom in so much that the neon fills the picture - click. The result is a large neon, but unfortunately the picture has only a very small data size and looks a little pixelated. Please always go as close as possible to the object and do NOT zoom in using the display. You will see the difference immediately in the picture quality!
Owners of single-lens reflex cameras can select as many different lenses as their budget allows. Most purchase a camera kit that includes an 18-55 mm zoom lens. This lens is ideal for complete aquarium shots. Just always keep a little distance and shoot with at least 30 mm focal length of the zoom to avoid distortion. Otherwise you will get "bulbous" lines of the aquarium edges in the wide-angle range below 30 mm.
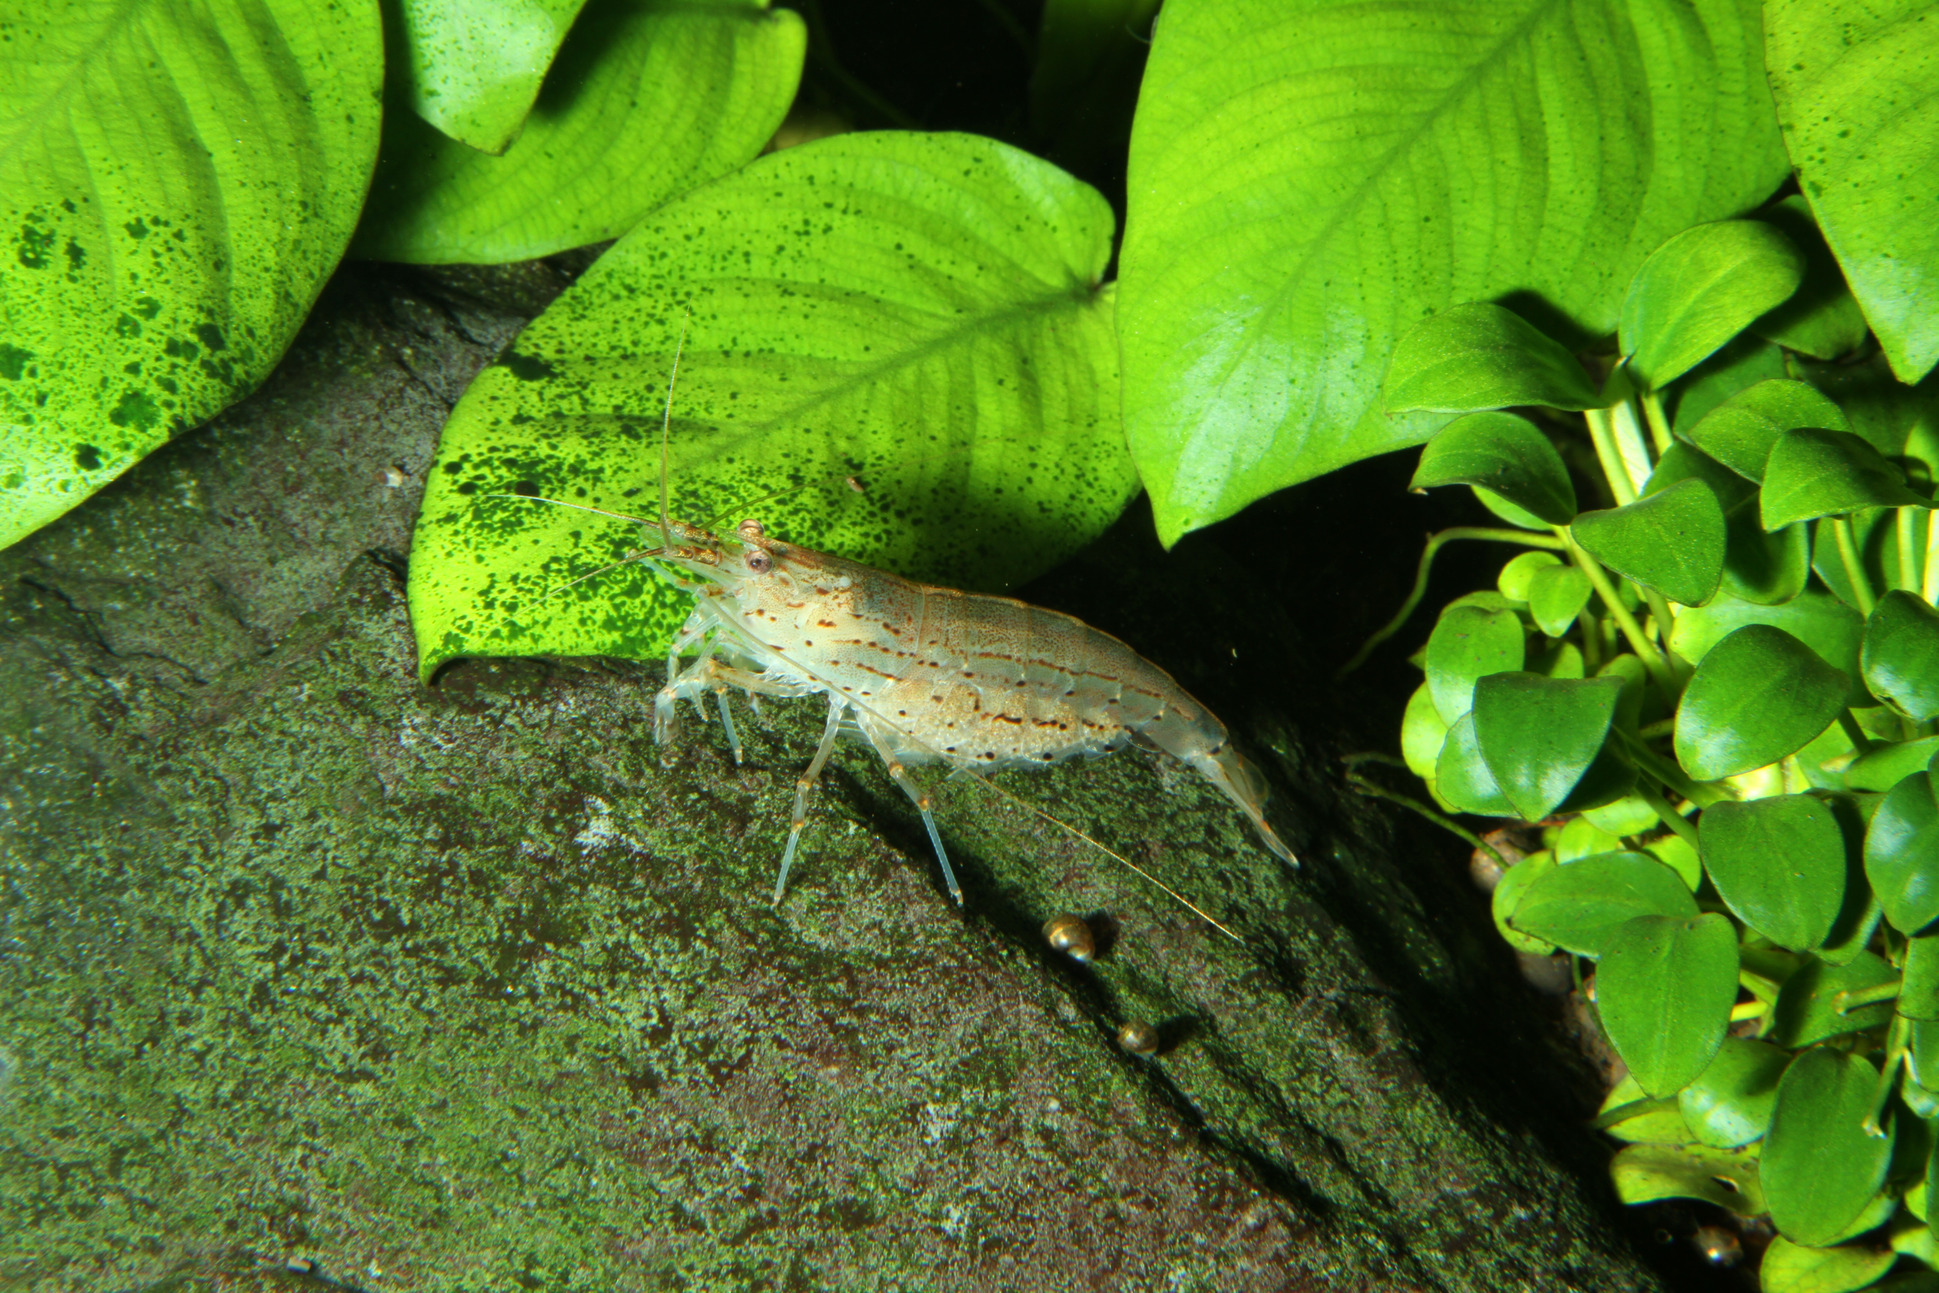
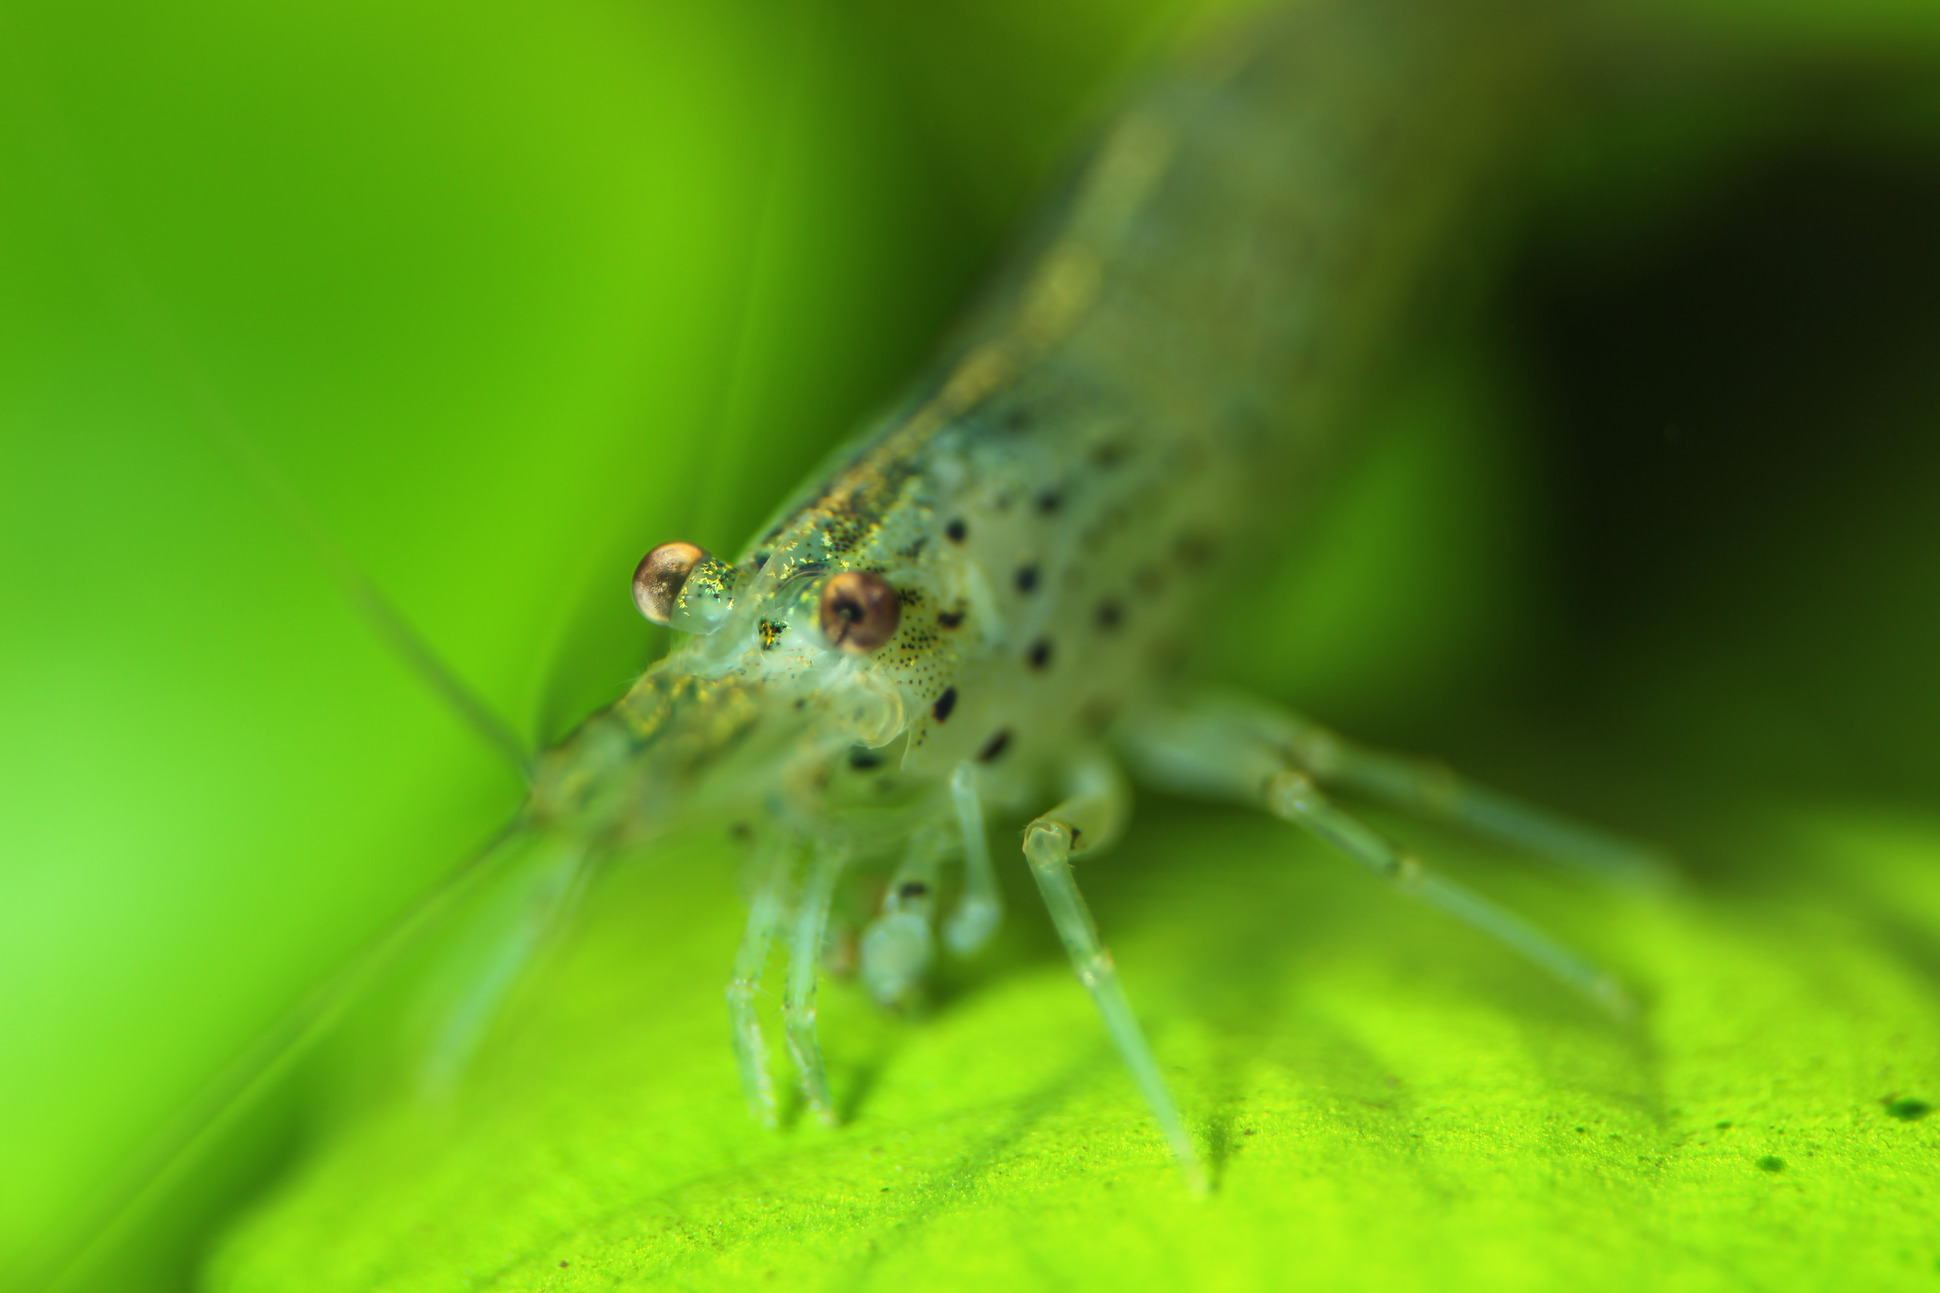
In order to capture full-frame images of small objects up to 36 mm in length, you need a macro lens or a good macro setting on your lens/camera. With macro lenses you usually have a choice of different focal lengths: 50/60 mm, 90/100 mm or 150/180 mm. All of these lenses can capture a 36 mm long fish to full size, just from different distances! With the 50 or 60 mm lenses, you have to approach to within 5-10 cm of the fish. In a 50 cm deep aquarium, this is already not possible in the rear part of the aquarium. 90 or 100 mm focal lengths are ideal for aquariums. You only need a 150 or 180 mm focal length with terrarium animals which shy from close shooting distances. Macro lenses have been designed precisely for the purpose of large magnification and produce visibly better quality than any normal lens with a "macro setting". But here, too, the following applies: low ISO setting, strong flash or flashes and aperture down to 22.
Stitching
A relatively new method to sensationally optimise the depth of field is stitching. Since the depth of field becomes shallower and shallower as the macro setting increases, for stitching you take many shots of the same subject, but all from a different plane of focus. On the computer, the many images are then stitched together to create incredibly detailed photos that would never be possible with one image, no matter how much the aperture is closed.
The action camera
Finally, a tip for all action-cam owners. Due to the relatively low prices and easy handling, GoPro and other action cameras are widely used. Unlike conventional cameras, the underwater housings for action cameras are affordable and can also be used for aquarium photography. There are extendable rods for the cameras that can be used to hold the camera in the aquarium. Give it a try. The interesting angles allow you to take pictures that would never be possible otherwise! You can't adjust the aperture, ISO or anything else, but the fisheye lens makes up for many shortcomings. All you have to do is provide as much light as possible from above with lamps.
And once you’ve got all this off by heart, take up underwater photography while snorkelling or diving on holiday. That will give you a whole new set of challenges…
Het zwarte doek
Reflektionen und Schmutz auf der Frontscheibe bleiben aber dennoch ein Problem. Bitte reinigen Sie die Frontscheibe (innen und außen) vor den ersten Aufnahmen gründlich und schlierenfrei. Nichts ist ärgerlicher, als ein tolles Foto, das durch Schmierereien auf der Scheibe unbrauchbar wird. Auch die Spiegelungen der Kamera oder des Fotografen in der Frontscheibe sind nicht unbedingt erwünscht. Nur als Selfie wäre es eine nette Idee. Schwarze Kleidung oder, noch besser, ein schwarzes Tuch mit Loch für das Objektiv sind die perfekte Lösung, um zum Beispiel auch Spiegelungen des Raumes in der Aquarienscheibe zu verhindern. Ich gebe zu, dass dies nach Aufwand klingt, aber es ist manchmal unumgänglich. Auf Veranstaltungen und Ausstellungen spiegeln sich die gegenüberliegenden Aquarien in der Frontscheibe. Dies ist wirklich nur durch einen Helfer mit einem schwarzen Tuch zu vermeiden.