Remplir d'eau
Ouvrez l'eau ! Voici comment remplir votre aquarium d'eau sans détruire tout le décor
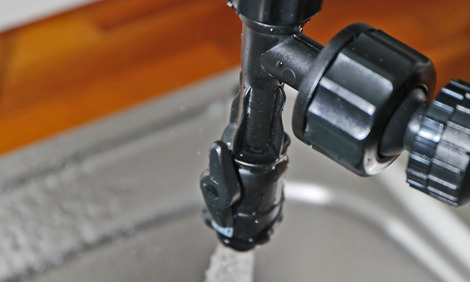
Plus votre aquarium est grand, plus vous devrez adopter une méthode qui vous permettra de le remplir avec un tuyau, directement depuis votre robinet. JBL vous propose même un système d'aspiration et de remplissage qui vous permet d'aspirer l'eau en un rien de temps pour faire un renouvellement partiel de l'eau et de le remplir ensuite à nouveau directement ( JBL Aqua In-Out, kit complet ). Ce système fonctionne même si votre aquarium se trouve plus bas que le lavabo.
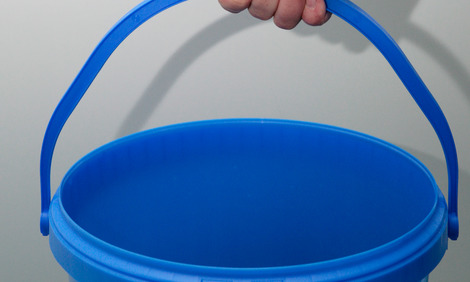
En alternative, vous pouvez naturellement utiliser aussi un seau d'eau, mais uniquement si ce seau n'a pas servi auparavant pour des produits d'entretien. Le versement du seau dans votre aquarium ne sera pas chose très facile, si vous ne voulez pas détruire tout de suite votre décoration.
Une assiette ou un sac en plastique étendu sur le contenu de l'aquarium vous aidera à protéger votre décoration du flux d'eau et à remplir lentement votre aquarium. L'idéal est aussi une microfibre filtrante ( JBL Symec VL ). Vous pouvez utiliser une eau légèrement tempérée. Contrôlez la température avec le thermomètre d'aquarium, puis ajustez-la à 24-26 °C.
L'eau du robinet n'étant pas toujours idéale pour les occupants de votre aquarium, nous vous conseillons d'utiliser un conditionneur d'eau ( JBL Biotopol ) qui neutralisera les substances nocives comme le chlore ou les métaux lourds dans votre eau et la transformera en eau d'aquarium.
En plus du JBL Biotopol, il existe encore quelques variantes spéciales pour les exigences particulières : si vous maintenez des crevettes ou des écrevisses, vous utiliserez du JBL Biotopol C (C comme crustacés) car, à la place de la protection pour la muqueuse des poissons, ce conditionneur d'eau contient des minéraux pour la mue des crustacés et nettement plus de chélateurs pouvant fixer le cuivre. Les fans de poissons rouges trouveront dans le JBL Biotopol R (R comme rouge) une forme spéciale de ce conditionneur d’eau, qui contient de l’extrait d’euphraise et offre une protection optimale aux poissons dans l’eau froide.
À quel moment et comment exactement doit-on utiliser le conditionneur d’eau ?
Si vous faites votre changement d’eau partiel avec un seau, c’est très simple : vous versez toujours la dose de conditionneur d’eau dans le seau, p. ex. pour les 10 litres contenus dans le seau. Mais si vous travaillez avec un tuyau, versez la dose de conditionneur dans l’aquarium après l’avoir aspiré, AVANT de remplir à nouveau l’aquarium d’eau. De cette manière, les substances problématiques de l’eau du robinet, comme le chlore ou le plomb, peuvent être directement neutralisées avant de pouvoir provoquer des dommages. Pourtant, le cas échéant, cette méthode pourrait déjà être mortelle pour les crevettes et les invertébrés, car ces animaux ne doivent EN AUCUN CAS entrer en contact avec du cuivre présent dans l’eau du robinet. Dans ce cas, seule la méthode du seau serait envisageable, le cuivre étant déjà neutralisé par le conditionneur d’eau dans le seau, AVANT de parvenir dans l’aquarium.
Installer des plantes et remplir le bac d’eau. Voici la marche à suivre !
Comment planter correctement les plantes d’aquarium ? Que pouvez-vous faire contre le fait que certaines plantes ne tiennent pas dans le sol et remontent régulièrement à la surface ? Comment remplir le bac d’eau sans démolir l’aménagement ?